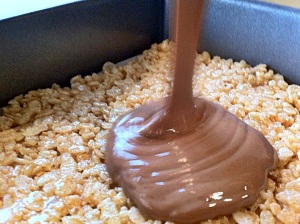
I promise not to make every single dessert in here peanut butter and chocolate. No matter how much I love the sweet-salty combination…. I really do know how to make other things, honest. But when I saw this recipe in my “Baked” cookbook, I couldn’t resist. I mean, just wait til you see how easy they are!!!
These (like most of the desserts I make) are “rich”. Again, I’m not the type of person who can find something to be “too rich”, “too sweet”, or “too” anything that will impede me from eating it… the only thing that is going to stop me from eating something is if it is “too repulsive”… which these aren’t. I promise.
I was surprised at how little “krispy” there was in the bottom layer. If I were to make these again, I may double the “krispy” layer… which would serve me well in two ways, since it’s near impossible to get my candy thermometer to accurately measure ¼ cup of water, even in my tiniest pan.
BAKED’s Krispies
For the krispies
1 3/4 c crisped rice cereal (I used the cheap stuff)
1/4 c sugar
3 Tbs light corn syrup
3 Tbs unsalted butter, melted
For the peanut butter layer
5 oz milk chocolate, coarsely chopped (I used chips, and they did just fine)
1 cup creamy peanut butter, though I don’t think crunchy would ruin it.
For the chocolate layer
3 oz dark chocolate (60 to 72 percent cocoa), coarsely chopped (I used leftover mini semi-sweet chips from my peanut butter pie)
1/2 tsp light corn syrup
4 Tbs unsalted butter
Krispy Layer:
Lightly grease the bottom and sides of an 8-inch square baking pan. (I put a parchment square in the bottom and it served very useful)
Put the cereal in a bowl and set aside. The recipe calls for a “large” bowl, but it’s really less than 2 cups of cereal… a medium-size bowl will do just fine.
Pour 1/4 cup water into a small saucepan. Gently add the sugar and corn syrup without letting any sugar or syrup get on the sides of the pan. Using wooden (or silicone) spoon, stir the mixture until just combined. Put a candy thermometer in the saucepan and cook over medium-high heat and bring to a boil cooking until the mixture reaches the soft-ball stage (235 F)
Remove from heat, stir in butter, and pour the mixture over the cereal. Quickly stir until the cereal is coated and then pour it into the prepared pan. Using your hands (or I used the silicone spatula I used for stirring), press the mixture into the bottom of the pan. Let the crust cool.
*I was surprised at how easy this part was, much easier than those sticky, marshmallowy krispie treats

melty melty
PB Layer: In a nonreactive bowl (I used glass), stir together the chocolate and the peanut butter. Set the bowl over a saucepan of simmering water and cook, stirring until smooth. Once smooth, remove from heat & pour the mixture over the cooled crust. (CAREFUL: THE BOWL WILL BE HOT—you may let it cool just a bit if you like). You can spread it with a spatula or I just tilted the pan until everything was evenly covered. Put the pan in the fridge to cool.
Chocolate Layer: In a nonreactive bowl, combine the chocolate, corn syrup, and butter.
Do the same as before, stirring with a rubber spatula over simmering water until the mixture is completely smooth. Remove once smooth and cool slightly so you don’t burn yourself while pouring. Pour the mixture over the chilled milk chocolate peanut butter layer and spread (or tilt) into an even layer. Put the pan into the refrigerator for 1 hour, or however long it takes you to go out for Thai and come back home… ya know, til the chocolate hardens.
Cut into squares and serve. Store in an airtight container in the fridge up to 4 days (according to the book). Since there’s nothing particularly prone to spoiling I don’t see why they wouldn’t last longer… I have no experience, though, since nothing this yummy lasts that long in my fridge.
[Adapted from Baked: New Frontiers in Baking]


Great work. I could easily eat too many of these in a sitting. I love the layers look too.
As I always say….the MORE chocolate and peanut butter, the BETTER!!! LOVE IT!!!
I agree 100%!!!