easy cheesy twists

DSC_8100

I don’t know if I’m still tired from the holidays or if it’s just because hockey is back, but I’ve been fixated on fast and easy appetizers.  I’m sure that this will wear off eventually, but for now I’m still trying to make things that I can throw together super fast without sacrificing flavor, like last week’s prosciutto flatbread.  Given my past success with puff pastry shortcuts, that was naturally one of the first things I thought of.

These cheesy twists are the perfect, easy appetizer for your next get together.  They require minimal effort AND you can make them in advance.  Yep.  That means you can spend like 30 minutes (if even) in the kitchen today, and freeze these and have them ready at the drop of a hat for the next time you have guests over.  That easy.

I used parmesan cheese because I know it gets nice and crispy.  I debated cheddar as well, but, ya know.  That would have taken me twice as long.  I’ve got another sheet of puff pastry on ice with cheddar written all over it.  I would go with any sharp cheese, you want it to have lots of flavor, because the pastry itself isn’t super flavorful.  If not parmesan, a good pecorino or asiago would certainly do the trick.  I also added a sprinkle of garlic powder, a dash of smoked paprika, and a hint of cayenne for a little bit of kick, but the skies the limit here.

Easy Cheesy Twists

[ Printable Recipe ]

  • 1 sheet puff pastry, thawed.
  • 2 ½ ounces (a little over ⅓ cup) parmesan cheese, finely grated
  • ½ teaspoon garlic powder
  • ½ teaspoon smoked paprika
  • pinch of cayenne
  • salt
  • Egg wash (1 egg, beaten with 1 Tablespoon of water)

1. Preheat oven to 400°F and line two baking sheets with parchment.

2. Roll puff pastry to smooth folds. Roll to about 12 inch by 10 inch rectangle.

3. In a small bowl, stir together the cheese and spices.

4. Rub surface of puff pastry with egg wash.  Sprinkle cheese mixture over half of the puff pastry and fold the un-cheesed half over the cheesed half.  Roll again to press the two sides together, you should now have a rectangle that is 6 or 7 inches by 10 inches.

5. Cut rectangle into ½-inch strips, you’ll end up with about 20 strips.  Grab each end of a strip and twist until you have a spiral.  Place on the baking sheet, and continue twisting each strip until they’re all twisted.

6. Now you have a choice – bake now or freeze for later

To bake now: Brush each strip with egg wash, sprinkle with salt, and bake for about 13 minutes until nice and golden.

To freeze: Place baking sheet in the freezer 40 minutes or until frozen.  Move twists into a freezer-proof bag and freeze until you’re ready to make them.  To bake from frozen, add an extra 2 – 3 minutes onto the baking time.


You may also like these easy bites:

cheesy artichoke bread  avocado fries  ccroll

fig and prosciutto flatbread

DSC_7846edit

It’s Monday and I’ve got a treat for you.

It’s one of my favorites.

It combines creamy mascarpone cheese, sweet fig jam, salty prosciutto, and peppery arugula that satisfies any possible craving you could have all in one bite.

Usually I would make this as a crostini on sliced and toasted baguette. Unfortunately, it can become very tedious when you have to spread and layer ingredients onto a bajillion little pieces of bread.  So when I was planning Christmas Brunch, it occurred to me that I could save a lot of time if I just made one giant crostini… I briefly thought about slicing a baguette in half, toasting the halves and going from there, similar to my cheesy artichoke bread recipe.

Then, as I was scanning the fridge to find something for dinner, my eyes stopped on a package of pizza dough from Trader Joe’s.  It came to me all at once, it was so simple I couldn’t believe I hadn’t figured it out before: flatbread!

DSC_7857edit

Flatbread was the solution to my problem.  (How many people can say that?)

I could make one large flatbread and just cut it into a bunch of bite-size appetizers for people to snack on.  Just grill your pizza dough until it’s cooked through, add your toppings, slice and serve.  The result was the perfect super fast, super easy way to make my favorite appetizer.

Prosciutto Flatbread

[ Printable Recipe ]

  • 1 pound pizza dough
  • 1/2 cup mascarpone cheese
  • 1/2 cup fig jam
  • 8 ounces prosciutto
  • 4 cups arugula

Divide your dough into two equal portions and roll into a ball, set on a lightly-floured surface and cover with a towel.  Bring to room temperature for about 1 hour prior to cooking.

Heat griddle or grill to high heat (or heat the oven to 500 degrees and put the rack on the lowest rung).  If you’re using the oven here, you’ll want to start pre-heating it at least 30 minutes early.

Shape your dough, I just stretched mine out into an oblong shape.  You can try for a circle or rectangle if it suits you, but don’t drive yourself crazy over it.  Sometimes I prick it with a fork to make it slightly less bubbly, but I’m not convinced that it makes a huge difference.

Grill your bread until poofed and browned on one side, then flip and cook the other side.  If you’re using the oven, it’s pretty much the same concept, you can leave it in there un-flipped just keep cooking until both sides are browned and the dough is cooked through.  You’ll have to do this twice, because there are two pieces of dough.  If you’re using the grill it only takes a few minutes per side, super easy!

Let it cool slightly, then when you can handle it comfortably, spread a layer of mascarpone on the flatbread (I find this is easier for some reason to do with the back of a spoon, maybe because the flatbread isn’t totally flat).  Then spread a layer of fig jam over the layer of mascarpone.  They’re going to mix together, it’ll be okay.  You’re halfway there.

Now you have two options, prosciutto and then arugula, or arugula and then prosciutto.  I prefer the latter, I find that putting the prosciutto on top helps to hold the arugula onto the flatbread.  If I put the arugula on top I end up chasing it around as it falls off of every bite I take.

Then, that’s it!  You’re done!  Slice it up and eat it.

cute caprese bites

dsc_5871-2smal

When the first thing out of Boyfriend’s mouth when he enters the kitchen is “OH MY GOD, ARE YOU TRYING TO KILL ME WITH CUTENESS!?” I consider that a win.

This army of cuteness couldn’t be easier to assemble, nor more delicious. Cherry tomatoes and basil are two things I pretty much always have on hand, I just happened to have a container of boccacini hanging out in the fridge that I just had to use up, so out came these little guys.

Sweet, salty, creamy…. perfect.

I wish I had more to say about them, but I just don’t. I think the pictures sum it up pretty good.

So the “recipe” if you’d like to call it that is as such

Cute Caprese Bites

  • 12 cherry tomatoes
  • 12 boccacini balls
  • 12 leafs of basil
  • Fleur de sel (optional)
  • Good quality balsamic vinegar (optional)

Cut cherry tomatoes in half, sprinkle boccacini with sea salt.

Place boccacini on bottom half of cherry tomato, top with basil leaf, and replace top of tomato. Skewer with a toothpick (or something fancier if you wish).

Sprinkle with sea salt and drizzle with balsamic vinegar. I suspect a drizzle of pesto might not be a bad idea either… ooh, or maybe pesto and balsamic on the side so you can dip into whichever you prefer… mmm

Enjoy

If you can’t find boccacini, just cube some fresh mozzarella and call it a day. 🙂

You may also like:

snack attack – avocado fries + onion rings

onion ring main

I never fry at home… like, never.

Never ever.

Ever.

Of course, I see all kinds of recipes for fried treats that I would love to make, but I never dare make them. The danger of opening up my home to frying food ts too great. Making a batch of donuts then leads to eating a batch of donuts, then I know nothing will compare to the home made ones and I will have to make more of them, then eat more of them, then….. other things will start being fried. Everything really. Everything will start to be fried.

It’s a slippery slope there, a dangerous one, and I try to stay away from that slope at all costs.

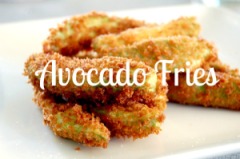
Well, my friends, Pinterest struck again with these gosh darned avocado fries. I was so intrigued by the whole concept…. avocado FRIES??? Overcome by a recent addiction to avocado, I couldn’t resist. The image in my head of biting into a crunchy, salty exterior surrounding a warm, creamy avocado was just too much to bare. They must be mine.

So I broke my cardinal kitchen rule: thou shalt not fry.

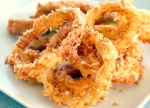
And, while I was at it, why not throw some onion rings in there too? I always have about a thousand onions in my fridge. And I had extra buttermilk to use up anyway. I’m already breaking my rule anyway…. See? 5 minutes in and I’m already sliding down that slope… and it all started with an innocent little avocado…

Well, both were delicious. And I felt extra guilty after eating them, even though Boyfriend wandered into the kitchen at some point to help consume them… he had to run to the store in the middle of it and…  I don’t know what happened. I blacked out and they were gone…

Yeah…. too bad I can never make these again. Never ever. Ever. Make these again. But you… You should definitely make them. Even if you never fry, maybe especially if you never fry. They’re dangerously good.

Avocado Fries Recipe Adapted from Sunset Magazine

  •          Canola oil for frying
  •          1/4 cup flour
  •          1 tsp kosher salt (or other seasoning blend of your choice)
  •          2 large eggs, beaten to blend
  •         1 1/4 cups panko
  •         2 firm-ripe medium avocados, pitted, peeled, and sliced into 1/2-in. wedges
  •         Grated parmesan (or other seasoning blend) for serving (optional)

1. Preheat oven to 200°. In a large saucepan, heat 1 1/2 in. oil until it registers 375° on a deep-fry thermometer. (I had to switch pans after realizing my original pan was not big enough to use my spider with) Line a baking sheet with foil, if you have a baking rack, place that on top of the baking sheet which will allow the hot air to flow around the rings while they’re in the oven.

2. Meanwhile, mix flour with 1/2 tsp. salt in a shallow plate. Put eggs and panko in separate shallow plates. (I like to use paper plates so I can just throw them away afterwards. Wasteful, I know.)

3. Slice avocado and sprinkle the avocado slices with the remaining ½ tsp salt. (Maybe a little more, be generous with it). Dip each slice in flour, shaking off excess. Dip in egg, then panko to coat. Set aside while you finish the rest.

3. Fry a quarter of avocado slices at a time until deep golden, 30 to 60 seconds. Transfer slices to a plate lined with paper towels. Keep warm in oven while cooking remaining avocados. Sprinkle with salt and a little grated parmesan (or other seasoning), if desired. I did some with southwestern seasoning and others just plain salt…. Both were delicious.

Panko Onion Rings

  •         1 sweet onion, cut into medium slices, rings separated
  •        1 cup buttermilk
  •         ¼ cup flour
  •         1 tsp kosher salt, plus more for seasoning
  •         2 large eggs, beaten to blend
  •         1 – 1 ½ cups Panko bread crumbs
  •         Canola Oil, for frying
  1. Marinate onion slices in buttermilk 30 minutes to 1 hour. Line a baking sheet with foil, if you have a baking rack, place that on top of the baking sheet which will allow the hot air to flow around the rings while they’re in the oven.
  2. Preheat oven to 200°. In a large saucepan, heat 1 ½ inch of oil to 375° on a deep-fry thermometer.
  3. Coat slices in flour, then egg, then panko. Refill panko as needed. Set aside coated rings while you coat the rest.
  4. When ready, fry onion rings a few slices at a time, making sure to not let the oil temperature drop too low.  Place fried onion rings on the rack and keep warm in the oven.
  5. Sprinkle with final salt (or other seasoning) and serve warm (preferably with some ranch to dip them in)

You may also like…

Cheesy Artichoke Bread


Soft Pretzels


Kettle Corn

cheesy artichoke bread

artichoke bread

As appetizers go, they don’t get much simpler than this. I have been meaning to make artichoke dip for, I don’t know, my whole life now. I just never seem to get around to it. Maybe i should rename this blog to “things I never get around to making” as there seem to be so many of them….

ANYWAY…. this easy-peasy appetizer gives you that delicious artichoke-dip flavor in a fast and easy topping instead. I used canned artichokes, seasoning-free and oil-free, you could steam your own if you prefer fresh. As always, Trader Joes is a pretty solid bet. I read once somewhere that Trader Joe’s is the only supermarket that has no BPA in their can linings, so that’s an added bonus if you’re worried about those types of things. Oh, “how was the bread,” you ask?

Deeelicious. I cut the bread into bite-size squares and served them alongside a fresh cara cara cocktail and BF and I had ourselves our very own “happy hour” in the comfort of our own home. Between the great flavor, and how quickly you can whip it up, this one’s definitely a keeper.

wee_eats on instagram

Cheesy Artichoke Bread

[ Printable Recipe ]

serving size depends on the size of your baguettes  – this recipe can easily be scaled up and down to suit the number of people you’re serving.

  • 2 french baguettes
  • 2 – 3 Tablespoons olive oil
  • 1 14-ounce can of artichokes in water, drained and chopped
  • 4 garlic cloves, minced
  • 1 1/2 cups freshly grated parmesan cheese
  • 1/3 cup grated mozzarella cheese
  • 1/4 cup seasoned panko bread crumbs (optional)
  • fresh parsley for garnish

Preheat oven to 400 degrees.

Cut the baguettes in half lengthwise and brush or drizzle with the olive oil. Equally distribute the minced garlic and chopped artichoke hearts.

Top each with a good handful of cheese, about 1/3 cup each. Sprinkle on a few breadcrumbs for extra crispness (not required).

Bake for 8 minutes, then heat the broiler and broil for 2 minutes, or until cheese is golden brown. Garnish with chopped parsley.

Adapted from Pinterest

You may also like…

soft pretzels

onion rings