chubby hubby bars

chubby hubby small

Finally, one of my favorite Ben & Jerry’s flavors has been transformed into a cookie. This is great for a number of reasons, most importantly that I can eat them with reckless abandon without the risk of brain freeze. For those of you who aren’t aware, chubby hubby ice cream contains chocolate, peanut butter, and pretzels in vanilla malt ice cream. Since I have had no luck finding this ever elusive “malt powder”, I made do without the malt and went for it anyway.

The bar form, my friends, is cookie dough, pretzels, chocolate, caramel, and mini reeses. You could translate it any number of ways, these are just the ingredients I happened to use. In an effort to keep them slightly less messy, I mixed the caramel with the chocolate ganache coating. Unfortunately, that caused the chocolate to not harden completely, but you live and you learn, I suppose. They are delicious all the same. Over at Cookies & Cups they did a layer of caramel instead, which was a bit messier than I was looking for, but I posted that version below as an option. Also, you may notice the actual ice cream does not have caramel, so just go ahead and skip it if you want, I won’t tell.  🙂

My main issue, aside from the chocolate that didn’t want to harden, was the fillings. When I was spreading the cookie dough the fillings all tended to stay towards the middle. So when you’re pouring from your  mixer bowl into the baking pan, i recommend doing four or five large “dollops” of dough, and then spreading them in their own areas to ensure equal distribution of the candy add-ins.

Chubby Hubby Bars

[ Printable Recipe ]

  • 2 1/2 cups all purpose flour
  • 1 cup (2 sticks) butter, room temp
  • 1 cup brown sugar
  • 1/4 cup white sugar
  • 2 eggs
  • 2 tsp vanilla
  • 1 tsp baking soda
  • 1/2 tsp coarse sea salt
  • 1 1/2 cups coarsely chopped pretzels
  • 1 (8oz) bag of Reese’s Mini cups (or 2 cups coarsely chopped full sized Reese’s)
  • 1 (14 oz) bag of caramels, unwrapped + 2 Tbsp water * (This is the 2nd option; see note)

Ganache Layer:

  • 1/4 Cup of creamy peanut butter
  • 2 Cups of semisweet chocolate chips
  • 1/4 Cup of butter
  • 2 Tbsp of heavy whipping cream
  1. Preheat oven to 350
  2. Line a 9×13 pan with foil or parchment and grease lightly with cooking spray.
  3. Beat together your butter and sugars until light and fluffy, approx 1 min. 
  4. Add eggs and vanilla, mix until incorporated. 
  5. On low speed add in your salt, baking soda and flour, mixing until just combined. 
  6. Slowly add in your Reeses and Pretzels, mixing until evenly distributed. 
  7. Spread in your prepared pan* (see note, no pictures because that part was extra messy and BF may have killed me if I got cookie dough on his fancy schmancy camera) and bake for 25 minutes.
  8. Let cool completely. Approx 30 minutes to an hour.
  9. When cooled, melt your caramels and 2 Tbsp water in a microwave safe bowl stirring every minute until melted.
  10. Pour over your bars.
  11. Chill in fridge for 15 minutes to set caramel.
  12. Make ganache: Take a small saucepan and a glass or heatproof bowl. Simmer water and place the bowl over the saucepan. Melt the ganache ingredients together and stir to combine. Pour over cookies. Place whole or crushed pretzels on top of chocolate, if desired.
  13. Put back in the fridge for at least 30 minutes or until chocolate is set.
  14. Cut into squares when ready to serve.

Notes:

*I mixed the caramel with the chocolate ganache coating. Unfortunately, that caused the chocolate to not harden completely, but you live and you learn, I suppose. 

* I recommend doing four or five large “dollops” of dough, and then spreading them in their own areas to ensure equal distribution of the candy add-ins. 

flour bakery’s sticky buns

sticky buns flour bakery

Sticky buns are like cinnamon roll’s edgier, fancier cousin. Brioche dough filled with cinnamon sugar, rolled tightly, then baked with a caramel glaze and toasted pecans.

Divine.

It’s really hard to justify consuming all of those calories for breakfast, which is why it’s OK that they take forever to make. Mine were done just in time for a post-lunch snack (or in-place-of-lunch snack… same thing). No worries, there are a number of shortcuts you can take to ensure yours are ready in time for breakfast.

I wasn’t particularly worried about spending my whole Saturday baking, though, so being in no rush I made my brioche dough the night before, left it in the fridge overnight, and proceeded to make my sticky buns the following morning. The dough makes enough for 2 sets of sticky buns or, in my case, a set of sticky buns and a loaf of brioche. A magical loaf of brioche.

I hope you were all very good in January, because diet time is over.

Over.

(PS – Thank you BF for my wonderful Christmas gift – my Flour Bakery cookbook) <3

Learn from my mistakes –

  • Don’t skimp on the pecans. You don’t want to see what the rolls look like under there
  • Make sure your “goo” thickens appropriately, but still be careful not to burn it. I was overly paranoid about burning it, which left my goo a little on the “runny” side. Still delicious, but thinner than it should have been.

Flour Bakery’s Sticky Buns

[ Printable Recipe ]

Goo:

  • 3/4 cup (1 1/2 sticks; 170 grams, 6 ounces) unsalted butter
  • 1 1/2 cups (345 grams) firmly packed light brown sugar
  • 1/3 cup (110 grams) honey
  • 1/3 cup (80 grams) heavy cream
  • 1/3 cup (80 grams) water
  • 1/4 teaspoon kosher salt

Rolls:

  • Basic Brioche Dough
  • 1/4 cup (55 grams) light brown sugar
  • 1/4 cup (50 grams) granulated sugar
  • 1/8 teaspoon ground cinnamon
  • 1 cup (100 grams) pecan halves, toasted and chopped

First, make the goo. In a medium saucepan, melt the butter over medium heat. Whisk in the brown sugar and cook, stirring, to combine (it may look separated, that’s ok). Remove from the heat and whisk in the honey, cream, water, and salt. Strain to remove any undissolved lumps of brown sugar. Let cool for about 30 minutes, or until cooled to room temperature. You should have about 3 cups. (The mixture can be made up to 2 weeks in advance and stored in an airtight container in the refrigerator.)

Make brioche dough and divide in half. Use half for this recipe and reserve the other half for another use. Can be made up to 1 week in advance.

On a floured work surface, roll out the brioche into rectangle about 12 by 16 inches and 1/4-inch thick. It will have the consistency of cold, damp Play-Doh and should be fairly easy to roll. Position the rectangle so a short side is facing you.

In a small bowl, stir together the brown sugar, granulated sugar, cinnamon, and half of the pecans. Sprinkle this mixture evenly over the entire surface of the dough. Starting from the short side farthest from you and working your way down, roll up the rectangle like a jelly roll. Try to roll tightly, so you have a nice round spiral. Trim off about 1/4- inch from each end of the roll to make them even.

Use a bench scraper or a chef’s knife to cut the roll into 8 equal pieces, each about 1 1/2-inches wide. **(At this point, the unbaked buns can be tightly wrapped in plastic wrap and frozen for up to 1 week. When ready to bake, thaw them, still wrapped, in the refrigerator overnight or at room temperature for 2 to 3 hours, then proceed as directed.)

Pour the goo into a 9 by 13-inch baking dish, covering the bottom evenly. Sprinkle the remaining pecans evenly over the surface. Don’t skimp on the pecans.

Arrange the buns, evenly spaced, in the baking dish. Cover with plastic wrap and put in a warm spot to proof until the dough is puffy, pillowy, and soft and the buns are touching-almost tripled in size, about 2 hours.

Position a rack in the center of the oven, and heat to 350 degrees F.

Bake until golden brown, about 35 to 45 minutes. Let cool in the dish on a wire rack for 20 to 30 minutes. One at a time, invert the buns onto a serving platter, and spoon any extra goo and pecans from the bottom of the dish over the top.

The buns are best served warm or within 4 hours of baking. They can be stored in an airtight container at room temperature for up to 1 day, and then warmed in a 325 degree F oven for 10 to 12 minutes before serving.

caramel apple pie

caramel apple pie 1

Few things are associated with America, fall, or thanksgiving quite like apple pie. There is something about the time of year that requires apple pies to be made. May or may not have something to do with apples being in season… nah, I’m sure it’s completely unrelated. Definitely something to do with pilgrims and indians and apples… then America was made and everyone feasted on apple pie a la mode… yeah, that sounds about right.

>.>

<.<

>.>

Back east, we have tons of apple orchards, you just go and pick your very own apples, watch some turn into cider, pet some farm animals, get a hot apple fritter, and bring however many pounds of apples you’ve acquired home for fresh apple pie, apple cobbler, apple sauce, or just plain apples.

The apples here are sad when compared to the ones back home, but just like lemonade from lemons, when life gives you apples…. No, don’t make apple-aid. Pie will do just fine. There are a lot of different apple pie camps. Not only is there debate over which apples to use – granny smith, macon, macintosh, golden delicious… So many varieties of apples are available they’ll make your head spin. And then there’s the crust – single crust, double crust, thick or thin crusts… Where’s a girl to start.

Well, for this girl at least, it starts with streusel. Not only does streusel make everything infinity better, it gives this pie a welcome ‘crunch’ that accents the soft apples and makes your mouth go “wow”. Not literally, of course, because then you’d be spilling apple pie out of your mouth, and what a waste of apple pie that would be, I don’t care how shocked you are. Swallow first, then “wow”. There will be no wasting of apple pie in my home. None.

BUT WAIT, THERE’S MORE! Just when you thought you were done, a drizzle of caramel takes it to the next level  – taking the pie up a notch from “apple pie” to “caramel apple pie”… That’s right. I went there. Mmmm … caramel… (did anyone else hear Homer Simpson in their head?)

For my pie, I used a mixture of pretty much whatever I could get my hands on at the store. The apples here don’t carry the same heft as back home, but they worked out just fine. I used, I believe, 2 granny smiths, 2 macintosh, and perhaps even a pink lady. With the added sweetness of the streusel and caramel though, feel free to stick with the tart granny smith for more flavor contrast. Otherwise, mix and match to your heart’s content.

Caramel Apple Pie

Printable Recipe

For the filling

  • 1 recipe single-crust pie dough
  • 3 tablespoons AP flour
  • 1 tsp ground cinnamon
  • 1/8 tsp salt
  • 6 c thinly sliced, peeled apples (about 3 large, or 6 small apples)

For streusel

  • 1 c packed brown sugar
  • ½ c AP flour
  • ½ c quick-cooking oats
  • ½ c butter
  • ½ c granulated sugar

For topping

  • ¼ c caramel topping

Preheat oven to 375F and prepare a pie pan for use.

1. Make pie crust and roll dough to 12-inch circle. Transfer to 9” pie plate.

OR … unroll thawed store-bought pie crust… blasphemy, I know

Make the streusel:

  1. Stir together brown sugar, ½ c AP flour and oats and cut in butter until crumbly.

Prepare the apples:

  1. Stir together sugar, 3 tablespoons of flour, cinnamon, and salt.
  2. Add apple slices and toss to coat. Transfer mixture to pie crust & sprinkle w crumb topping.

Bake

  1. Cover edges of pie with crust covers or aluminum foil and bake 25min @ 375F.
  2. Remove foil and bake additional 25 – 30 min until top is golden.
  3. Remove from oven and drizzle with caramel. Cool before serving

millionaire’s shortbread bars

millionaire bar

Hello everyone! Did you miss me terribly? I’m on a plane back to AZ as we speak, and decided you all deserved a new recipe in case you were in the baking mood this weekend. I had to look through my recipe drafts, since I obviously haven’t been around to bake.These seem like a popular one, and I think with a few tweaks they could really live up to their full potential 🙂

Millionaire Shortbread recipes have been invading the internet for a few years now. Once BAKED bakery released their first cookbook, this recipe was the first one to explode. Actually, probably BAKED brownie was first, followed by this wildly popular bar. It’s remniscent of one of my favorite candy bars: Twix.

Laziness prevented me from finally getting around to making these, I mean, layers and stuff. Effort. Ugh. Wow I’m whiny… anyway if you follow the recipe in the actual book it’s not so bad. They actually do more of what I guess is technically a “dulce de leche” caramel layer. You just boil the sweetened condensed milk until it turns into “caramel”. That being said, I didn’t care for it. I found the bars lacking in a few ways, but since the recipe is so wildly popular, I figured I should let you guys decide for yourselves.

In MY opinion, the flavor was a little flat. So my recommendations are: add a 1/2 tsp vanilla to the shortbread layer. MAKE YOUR OWN REAL CARAMEL, not the “caramel-del-can”.  Oh, and a sprinkle of fleur de sel never hurt anyone…Since I’m on an airplane, I don’t have access to a ‘go-to’ caramel recipe, so I’ll put this $13 in-flight internet to use and find one to link you to.

MILLIONAIRE SHORTBREAD BARS

[ Printable Recipe ]

Shortbread (for better shortbread recipe, see my Tagalong bars)

  • 1/2 cup sugar
  • 1 1/4 cups (2 1/2 sticks) unsalted butter, softened
  • 2 /12 cups all-purpose flour
  • 1 large egg yolk, slightly beaten

Caramel filling

  • 28 ounces sweetened condensed milk (two 14-ounce cans)

Chocolate glaze

  • 6 oz dark chocolate (60% cacao), coarsely chopped
  • 1 teaspoon light corn syrup
  • 1/2 cup (1 stick) unsalted butter, softened, cut into cubes

For the shortbread:

  1. Preheat the oven to 350°F. butter (or line with parchment) the bottom and sides of a 9-by-13-inch baking pan.
  2. In the bowl of an electric mixer fitted with the paddle attachment, beat the sugar and butter together until blended
  3. Add 2 cups of the flour and beat until well combined. Add the egg yolk and beat for a few seconds, or until just combined.
  4. Turn the dough out onto a lightly floured work surface. Dust the top of the dough and your hands with a little flour. Use your hands to gently work the dough into a 6-by-6-inch square. You will have to turn the dough and sprinkle the top with flour as you go. Sprinkle the remaining 1/2 cup flour on the surface of the dough. Fold the dough over and knead until incorporated, then flatten the dough into a rectangle. Transfer the rectangle to the prepared pan and press it into the pan.
  5. Prick the dough all over with a fork and bake in the center of the oven for 20 to 22 minutes, until golden brown. Transfer to a wire rack and let cool completely.

For the caramel filling:

  1. Put the sweetened condensed milk in a large microwave-safe bowl. Cook on 50 percent power (medium) for 4 minutes, stirring briskly halfway through, until smooth. Continue cooking on 30 percent power (medium-low) for 12 to 18 minutes, until very thick and caramel colored, stirring briskly every 2 minutes, until smooth.
  2. Pour the caramel filling over the cooled shortbread and place the pan in the refrigerator until cool, about two hours.

For the chocolate glaze:

  1. In a large nonreactive metal bowl, combine the chocolate, corn syrup, and butter. Set the bowl over a saucepan of simmering water and cook, stirring with a rubber spatula, until the mixture is completely smooth. *Alternatively, you can melt it in a microwave-safe bowl at 30 second intervals until melted
  2. Remove the bowl from the pan and stir for 30 seconds to cool slightly. Pour the mixture over the chilled caramel layer and use an offset spatula to spread it into an even layer. Put in the refrigerator for 1 hour, or until the glaze hardens.
  3. Remove the pan from the refrigerator 30 minutes before serving so as not to crack the chocolate glaze. Cut into squares and serve.

The bars can be stored in the refrigerator, tightly covered, for up to 4 days.

BETTER Milli Shortbread recipe…

Alternate Cookie Recipe

For the cookie layer

  • 1 cup (2 sticks) butter, room temperature
  • ½ cup sugar
  • 2 cups all purpose flour
  • ¼ teaspoon baking powder
  • ½ teaspoon salt
  • 1 teaspoon vanilla extract
  • 2 tablespoons milk
  1. Whisk together flour, baking powder, and salt. Set aside.
  2. Beat butter and sugar until light and fluffy. Beat in vanilla extract and milk. Add flour and mix on low until just incorporated. It will be on the dry side.
  3. Pour out onto parchment paper and form into general rectangle shape. Roll close to 9 x 13” and transfer into 9 x 13 baking pan. Press into bottom of pan until it reaches the edges, leaving a slight lip on the edges.
  4. Poke holes in shortbread with a fork and bake at 350F for about 20 minutes, until lightly golden on top. Cool completely on wire rack before topping.

BFF recommends this caramel recipe instead, I think it looks a little over the top but this one’s “tested and BFF approved” so it’ll do 🙂

Alternate Caramel Recipe

  • 2 cups sugar
  • 3/4 cup Lyle’s Golden Syrup
  • 1/2 cup water
  • 1 teaspoon lemon juice
  • 1 cup heavy cream
  • 1 cup sweetened condensed milk
  1. In a large saucepan, stir together the sugar, syrup, water and lemon juice.  Wet the sides of the pan with a little water if any of the ingredients have crept up.  Cover the saucepan and cook it over medium heat for 4 minutes.
  2. Remove the lid, increase the heat and bring the mixture to a boil.  Do not stir.  The mixture will bubble, and if sugar appears on the sides of the pan, brush them back down with a wet pastry brush.  The bubbles will continue to get larger.
  3. In the meantime, bring the heavy cream to a boil in a small saucepan.   Remove from the heat and set aside.
  4. Return to the sugar mixture, which will turn golden brown after 5 or 6 minutes.  With a candy thermometer, make sure the mixture has reached 300, then remove the pan from the heat and let it rest for 1 minutes, until the bubbles subside.  Whisk in the heavy cream off the heat and whisk in the condensed milk.  Continue to whisk until the mixture is smooth
  5. Return the saucepan to medium heat and stir constantly until the caramel reaches 240. Pour over the shortbread and allow to set.

[ Original recipe adapted from Baked ]

[ caramel recipe borrowed from here ]

sweet n salty

sweet n salty brownie

It always feels good to unwind after a stressful day/week/month with some good, old-fashioned kitchen therapy. Spending time in the kitchen becomes such a zen experience for me. Something about baking in particular is very therapeutic. It even gives you extra time to wind down in the middle of the process. While things are baking you can clean the dishes you used, read a magazine, watch a show, dust the book shelves, have a cocktail… ya know, relax.

Well, following a crazy week/month at work, helping my mom move this weekend, the stress of remodeling, oh and our garage door broke on Friday, I needed some kitchen therapy. So today, after I finished all the laundry, gymed, and straightened up a bit- BF headed out to fix our garage door (poor guy can’t get a break) and I headed into the kitchen to find my sanity.

This recipe can be found in Baked Explorations (the second book released by Baked Bakery in NYC- still unclear how BFF and I missed it when we went… we really have to get back there). Since I have been too poor/cheap to purchase this particular book, I’ve been stuck just leafing through the recipes in stores and staring longingly at it through store windows. 🙁 That is, until I saw Brown Eyed Baker‘s post for “Sweet & Salty Brownies”. Finally, my first glimpse into the wonderful world of Baked Explorations.

The Baked Brownie alone is intense, rich, and decadent. This version basically takes the Baked Brownie – which is already a 10 on intensity, and turns it up to 11. I was expecting this to be: layer of brownie > layer of caramel > layer of brownie. Nope. Somehow this magical thing happens where the caramel becomes one with the batter, forming this crazy sweet-salty-caramel-brownie hybrid dessert that has just enough brownie “crust” to make it a solid piece. You can actually tell which brownies have more of the caramel in them, because they look “wetter” than the ones that have less. (So you know which ones to go for ;-))

My attempts at describing the brownie really do it no justice, you will just have to try one for yourself. Just trust me when I say that the salty caramel accents the chocolate brownie perfectly… and to make sure you have a tall glass of milk nearby when you eat one.


Sweet & Salty Brownies – Recipe from Baked Explorations

Printer-Friendly

Caramel Filling:
1 C sugar
2 Tbsp light corn syrup
½ C heavy cream
1 tsp fleur de sel
¼ C sour cream

Brownie Batter:
1¼ C AP flour
1 tsp salt
2 Tbsp unsweetened cocoa powder (I used Valhrona)
11 oz dark chocolate, coarsely chopped (my least favorite part of brownie-making)
1 C (2 sticks) unsalted butter, cut into 1-inch cubes
1½ C sugar
½ C brown sugar
5 eggs, at room temperature
2 tsps vanilla extract

Topping:
1½ tsps fleur de sel
1 tsp coarse sugar

For the Caramel:

1. In a small saucepan, combine the sugar and corn syrup with ¼ cup water, stirring them together carefully so you don’t splash the sides of the pan. Cook over high heat (I started on medium, then turned it up to medium-high when I was ready to give it my full attention) until an instant-read thermometer reads 350 degrees F, or until the mixture is dark amber in color, 6 to 8 minutes.

2. Remove from the heat, and carefully add the cream (it will spit) and the fleur de sel. Whisk in the sour cream. Set aside to cool.

it'll end up like this

it’ll end up like this – creamy and dreamy

Make the Brownie Batter:

Preheat oven to 350 degrees F.

1. Butter the sides and bottom of a glass or light-colored metal 9×13-inch pan. Line the bottom with a sheet of parchment paper, and butter the parchment.

2. In a medium bowl, whisk together the flour, salt and cocoa powder.

3. Melt chocolate and butter together in a heat-proof bowl over simmering water. Once melted to a smooth consistency, turn off the heat, and add both sugars. Whisk until completely combined and remove the bowl from the pan. The mixture will look something like:

4. Add 3 of the eggs to the chocolate mixture and whisk until just combined. Add the remaining eggs and whisk until just combined. Add the vanilla and stir until combined. Do not overmix!

5. Sprinkle the flour mixture over the chocolate & gently fold into the wet ingredients.

Assembling the Brownies:

1. Pour half of the brownie mixture into the pan and smooth the top with a spatula. Drizzle about ¾ cup of the caramel sauce over the brownie layer in a zigzag pattern, making sure the caramel doesn’t come in contact with the edges of the pan. Use an offset spatula to spread the caramel evenly across the brownie layer, leaving about a ½-inch border around the edges. In heaping spoonfuls, scoop the rest of the brownie batter over the caramel layer. Smooth the brownie batter gently to cover the caramel layer.* (see tips)

2. Bake the brownies for 30 minutes, rotating the pan halfway through the baking time, and check to make sure the brownies are completely done by sticking a toothpick into the center of the pan. The brownies are done when the toothpick comes out with a few moist crumbs.

3. Remove the brownies from the oven and sprinkle with the fleur de sel and coarse sugar.

4. Cool the brownies completely before cutting and serving.

*Tips

*Every time I make Baked brownies I’m afraid I under-baked them. Despite my toothpicks coming out clean, even over-baking a batch, they are always ooey-gooey inside to the point that I’m not convinced they’re fully cooked. Rest assured that they are. (or that I’m certifiably crazy)

*When you’re doing the top brownie layer, I suggest spooning the batter from the outside in. I am bad at following directions and just started dumping the batter in which caused the caramel to push through its “1/2-inch border”… oops!

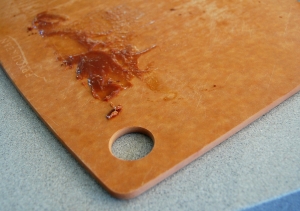
*Again, be careful with the 2nd brownie layer, as the leaked caramel glued some of my brownies to the pan, and made a terrible, terrible mess… (see below)

sticky caramel mess

sticky caramel mess

*A lot of people are afraid of cleaning up after caramel, it’s really not that bad. Remember- caramel is made out of sugar, which dissolves in water. All you need is hot water, let it sit, and voila- you’re done!

*It was easier to cut the brownies after chilling them in the fridge for an hour

*The brownies can be stored, tight wrapped at room temperature, for up to 4 days.


If you like this recipe, you’ll love these: