a toast by any other name

bruschetta red pepper 9786

Apparently the next logical obsession, after strawberries, is bruschetta.  Or “crostini” depending on your preference.  It appears, according to Wikipedia, that the difference is that the former is rubbed with garlic, possibly?  So I guess technically these would be crostini?

Whatever, any way you slice it (bread pun!), it’s toasted bread topped with stuff.

Let’s just agree that we can call it any of the above, as a piece of toast by any other name is still equally as delicious.

So far we’ve had toast topped with strawberries and with prosciutto and fig, and now I bring you toast topped with red peppers.

Roasted red peppers.  And feta.

Because they were made for each other.  True story.

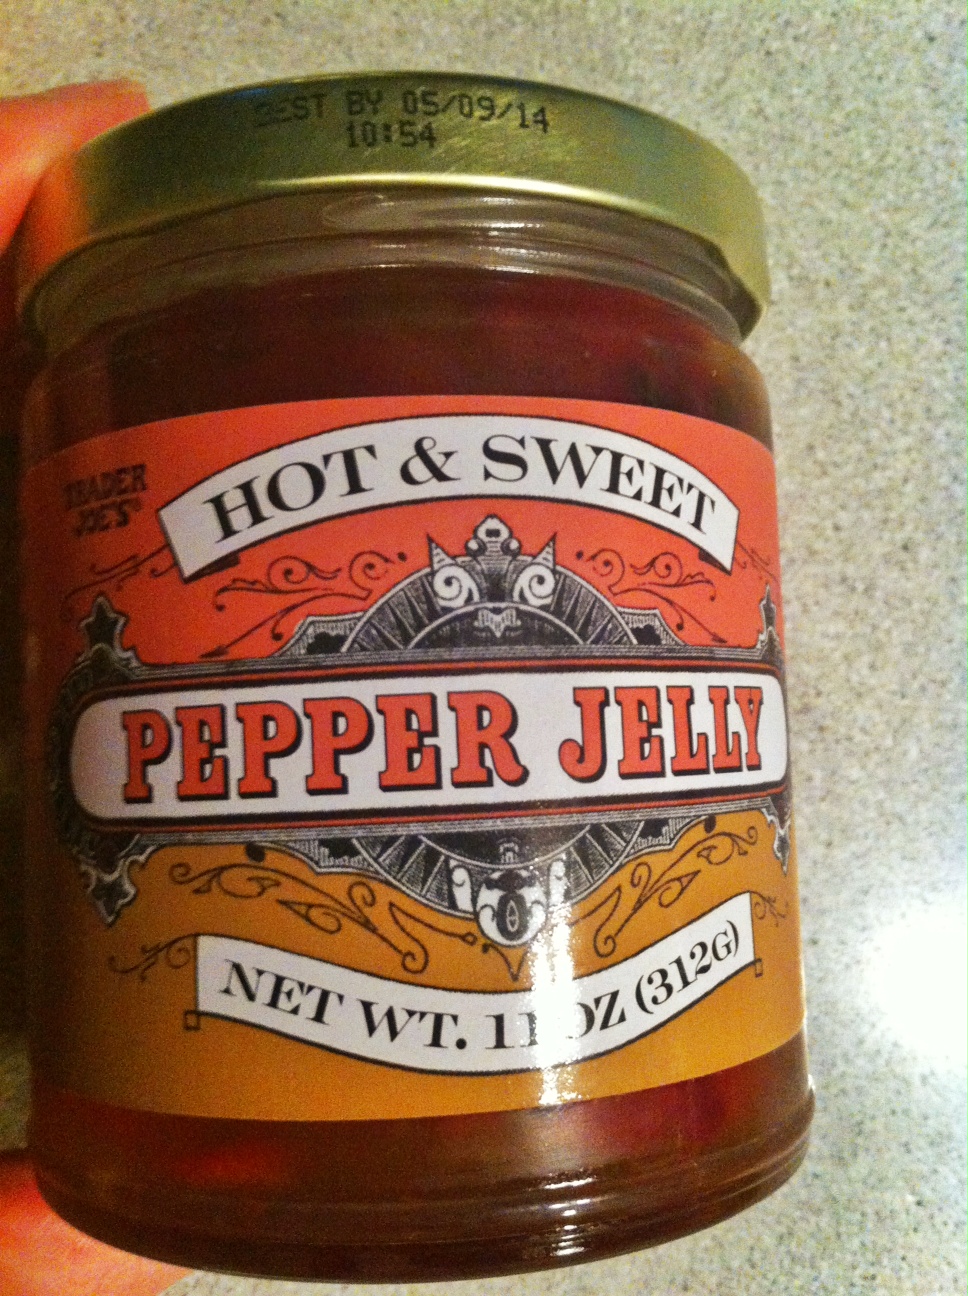
But then there was this

pepper jelly

It’s so good I was spreading it on crackers, bread, and would be lying if I said that I didn’t think about trying it with a PB&J…

Hey, I said THINKING.  Don’t judge.  Then I thought about the fig jam and mascarpone… and how well goat cheese and red peppers get along…

And then my brain made me do this…

bruschetta red pepper jelly 9829

A crostini smeared with goat cheese and topped with red pepper jelly.  Simple, sweet, tangy.

If you’re not a fan of tangy goat cheese, red pepper jelly also gets along great with mascarpone or cream cheese… Then again, what doesn’t?


Roasted Red Pepper and Feta Bruschetta

Printable Recipe

  • 1 french baguette
  • 1 jar roasted red peppers
  • 6 ounces feta, crumbled
  • 2 ounces cream cheese, room temperature
  • ¼ to ½ teaspoon red pepper flakes
  • Olive oil, to taste
  • Salt, to taste

1.  Slice the baguette on the bias into ¼-inch slices.  Drizzle or brush with olive oil and sprinkle with salt.  Toast on both under the broiler until just golden, flip and toast other side.  Once toasted, remove from oven and set aside to cool.

2.  Chop red peppers and set aside.  In the jar of a food processor, process the feta, cream cheese, and red pepper flakes until smooth.  Stream in olive oil until the feta reaches desired consistency, it should be light and fluffy, but not runny.  Taste and add salt as needed.

3.  Spread whipped feta on the baguette, top with chopped red peppers, eat.

* Soft goat cheese would also be delicious with the chopped, roasted red peppers as a topping

Pepper Jelly and Goat Cheese Bruschetta

Printable Recipe

  • 1 french baguette
  • 1 jar red pepper jelly
  • 6 ounces goat cheese, room temperature

1.  Slice the baguette on the bias into ¼-inch slices.  Drizzle or brush with olive oil and sprinkle with salt.  Toast on both under the broiler until just golden, flip and toast other side.  Once toasted, remove from oven and set aside to cool.

2.  Spread baguette with goat cheese, then top with red pepper jelly.  Eat and enjoy!

* If you don’t like the tang of goat cheese, try cream cheese or mascarpone instead


BLT Steak Popovers

popover 1

One word: Popover.

You will love them.  You will crave them.  You will keep yourself up at night thinking about them.

You see, it all started innocently enough last year during Arizona’s Restaurant Week.  The BF and I saw that BLT Steak had an awesome (read: SUPER cheap) prix fixe menu.  We had to go.  And so we did.

The food was phenomenal, but it didn’t even matter because I was full even before my salad came.  Full of this delicious, magical, puffy goodness that was brought to our table.  A cheesy balloon of delicious.  They bring these wonderful treats to your table after you order, while you await your meal, for no reason at all, except to taunt you.  You know that if you eat it, you won’t have room for your dinner, but how could you resist?

popover 3

You can’t.  You can’t resist.  Not if you are even a tiny bit human inside.

I asked to wrap my remaining bit of popover to take home, and the wonderful waitress brought me a brand new one instead.  That beautiful woman.  If you follow wee eats on instagram, you would have seen it.  It looked like this.

blt popover

That’s it after I brought it home and reheated it, wrapped in foil, in a 375 degree oven until it was warm again.  Magical, right?

So you can imagine how thrilled I was that they served them with a recipe card.  Yes, WITH the recipe.  Like all, “Here are our popovers, and we know you will love them so much that we will also give you the recipe.  Aren’t we amazing?  Why yes, yes we are”

Since I don’t need a giant belly-filling popover, I used my mini popover pan (this is the recipe that caused me to buy it, by the way), and instead of gruyere I used cheddar.  Because I happen to really like sharp cheddar.  Use whatever cheese you love, they are all yours.  Serve them warm with butter and sea salt.  Your life will be changed.

popover 2

BLT Steak Popovers

Makes 24 mini popovers or 12 large popovers

Printable Recipe

  • 2 cups milk, heat to very hot, but NOT boiling*
  • 4 eggs
  • 2 cups all-purpose flour
  • 2 generous teaspoons kosher salt
  • 1 cup cheese, finely grated (BLT uses gruyere, I used cheddar for these)

1.  Place popover pan on a rimmed baking sheet and put into the oven.  Preheat your oven, with the pan in it, to 350°F

2.  Warm milk on stove top or microwave until hot, but not boiling (about 1.5 – 2 minutes in my microwave).  Set aside.

3.   In a small bowl combine the flour and kosher salt, set aside.

4.  Whisk eggs until frothy and pale yellow in color, you can do this in a blender, in a large bowl with an immersion blender, or with a standard mixer.

5.  Once frothy, reduce the speed and slowly add 1/3 of the milk to the eggs until combined.  You want to make sure to go slowly with the milk so that you don’t curdle your eggs.  Once 1/4 of the milk is added, add slowly another 1/3 of the milk while mixing.

6.  While continuing to mix on low, add your flour mixture.

7.  Once flour is incorporated, add the remaining 1/3 of milk and mix until blended.

8.  Here is where the trickiness comes in, you can rest the batter anywhere from 15 to 45 minutes if you feel so inclined.  But you see my popovers up there?  I didn’t have the patience to rest anything.  Those were baked right away.

9.  Remove hot pans from oven and spray with non-stick pan spray* (or drop a little butter, or a little shortening, you remember this part from this recipe, right?), and pour batter about 3/4 (maybe a little more) to the top of each cup.  Sprinkle the top liberally with the grated cheese, be careful not to have the cheese touch the actual baking cup or it will melt and stick and prevent your popover from “popping”.

10.  Bake 50 minutes for full-size popovers, or about 35 to 40 minutes for mini popovers (I started peeking through the window around 30 minutes, if you don’t have a window, don’t even think about opening that door until 35 minutes in).  Once done, remove from the oven and allow to cool about 5 to 10 minutes, until you can comfortably handle them. Note: If you are using a muffin tin or mini muffin tin, your baking time may be less

* If you’re afraid of curdling your eggs, you can probably skip warming the milk and just make sure to use room temperature milk and eggs.  I just said to warm it because that’s what BLT says (and that’s what I did, and it worked beautifully).

* You can grease your tins with butter (which I used), but there is folklore surrounding the need to use vegetable shortening, and equally as much about using vegetable oil, or even PAM.  I put about a teaspoon-sized cube of butter into each mini tube before putting it into the oven.  The pool of butter did give them little “pigtails” at the end, I wish I’d taken a picture.  They were super cute.

I’ve read that regular-size muffin tin popovers will bake in about 35 minutes or 18 – 23 minutes for mini-muffin tin popovers., but I’m not sure since I’ve not made them.

* If making multiple batches, reheat the pan in the oven for 10 minutes before adding your second batch of batter

easy cheesy twists

DSC_8100

I don’t know if I’m still tired from the holidays or if it’s just because hockey is back, but I’ve been fixated on fast and easy appetizers.  I’m sure that this will wear off eventually, but for now I’m still trying to make things that I can throw together super fast without sacrificing flavor, like last week’s prosciutto flatbread.  Given my past success with puff pastry shortcuts, that was naturally one of the first things I thought of.

These cheesy twists are the perfect, easy appetizer for your next get together.  They require minimal effort AND you can make them in advance.  Yep.  That means you can spend like 30 minutes (if even) in the kitchen today, and freeze these and have them ready at the drop of a hat for the next time you have guests over.  That easy.

I used parmesan cheese because I know it gets nice and crispy.  I debated cheddar as well, but, ya know.  That would have taken me twice as long.  I’ve got another sheet of puff pastry on ice with cheddar written all over it.  I would go with any sharp cheese, you want it to have lots of flavor, because the pastry itself isn’t super flavorful.  If not parmesan, a good pecorino or asiago would certainly do the trick.  I also added a sprinkle of garlic powder, a dash of smoked paprika, and a hint of cayenne for a little bit of kick, but the skies the limit here.

Easy Cheesy Twists

[ Printable Recipe ]

  • 1 sheet puff pastry, thawed.
  • 2 ½ ounces (a little over ⅓ cup) parmesan cheese, finely grated
  • ½ teaspoon garlic powder
  • ½ teaspoon smoked paprika
  • pinch of cayenne
  • salt
  • Egg wash (1 egg, beaten with 1 Tablespoon of water)

1. Preheat oven to 400°F and line two baking sheets with parchment.

2. Roll puff pastry to smooth folds. Roll to about 12 inch by 10 inch rectangle.

3. In a small bowl, stir together the cheese and spices.

4. Rub surface of puff pastry with egg wash.  Sprinkle cheese mixture over half of the puff pastry and fold the un-cheesed half over the cheesed half.  Roll again to press the two sides together, you should now have a rectangle that is 6 or 7 inches by 10 inches.

5. Cut rectangle into ½-inch strips, you’ll end up with about 20 strips.  Grab each end of a strip and twist until you have a spiral.  Place on the baking sheet, and continue twisting each strip until they’re all twisted.

6. Now you have a choice – bake now or freeze for later

To bake now: Brush each strip with egg wash, sprinkle with salt, and bake for about 13 minutes until nice and golden.

To freeze: Place baking sheet in the freezer 40 minutes or until frozen.  Move twists into a freezer-proof bag and freeze until you’re ready to make them.  To bake from frozen, add an extra 2 – 3 minutes onto the baking time.


You may also like these easy bites:

cheesy artichoke bread  avocado fries  ccroll

scarpetta’s stromboli

scarpetta stromboli
As you know, I’M ON VACATION! Well, technically I’m on my way BACK from vacation now… You’ll all know soon enough about what I have been eating while I was on vacation, but many of you may be wondering what the BF eats while I’m on vacation. What does the BF eat when I’m not home to cook for him? Well, honestly, probably a lot of fast food. But I do leave him some home-cooked goodness in the freezer to eat just in case he is motivated enough to heat it up.

For this trip, one of the items I left behind for him was a loaf of tasty homemade stromboli from the Scarpetta’s stromboli recipe.We ate this stromboli for dinner, but Scarpetta’s serves it as part of their bread basket.

Stromboli (essentially a rolled up pizza) is fresh bread filled with meat and cheese and served with a dipping sauce. My favorite types of stromboli growing up came from my momma’s oven, filled with ham and cheese or meatballs and sauce… so don’t feel like you have to be stuck with the fillings in the recipe.

Whether you want an appetizer to feed a crowd or a simple dinner, this recipe is perfect for you. Plus, it’s a great candidate for freezing. You can just slice the stromboli and freeze it, wrapped in foil, then in a plastic bag. To reheat, warm the foil-wrapped stromboli in the oven for about 20 – 30 minutes at 375 degrees. The time it takes to warm may vary depending on how much you are warming at once and the thickness of your slices.

Scarpetta’s Stromboli Recipe

[ Printable Recipe ]

Dough:

  • 1 tablespoon dry yeast
  • Extra-virgin olive oil
  • 5 1/2 cups bread flour
  • 2 teaspoons salt

Filling:

  • 2 cups grated smoked mozzarella
  • Salt
  • 1/2 bunch fresh basil, leaves chopped
  • 1 tablespoon chopped garlic
  • Freshly ground black pepper
  • 4 ounces salami, sliced thin
  • Extra-virgin olive oil

Toppings:

  • 1 tablespoon fresh rosemary leaves, chopped
  • 1 teaspoon sea salt, such as Maldon
  • 1/4 pint cherry tomatoes, halved

For the dough: Whisk together 2 cups cold water, the yeast and 1 1/2 tablespoons oil.  Put in a stand mixer with the dough hook attachment. Mix on low speed for 5 minutes.  Add the flour and continue mixing for an additional 5 minutes. Then mix on medium speed for an additional 5 minutes. Add the salt until incorporated. Add 1 tablespoon oil at the end of the 5 minutes.

Transfer the mixture to a a large bowl and drizzle about 2 tablespoons oil on top. Wrap all the way around with plastic wrap and put in a warm spot to rise for about 1 1/2 hours until doubled in size.

Preheat the oven to 375 degrees F when you are getting ready to fill the strombolis.

To make the stromboli: When ready, transfer the dough to an oiled table or flat surface and form into a log; cut into two equal pieces. Cover with plastic so it doesn’t dry out. Let rest for another 5 to 10 minutes.

Lightly brush a baking tray with oil or cover with parchment.  Spread out the dough on the oiled countertop with the palms of your hands, don’t use your fingertips. It should be even all the way around, with no fat edges.

Place half the fillings on one piece of dough in the order listed: mozzarella, salt, basil, garlic, pepper and salami, leaving a 2-inch border along the bottom. Roll the dough over twice, seal the sides with your palm, fold over the bottom and then the sides. Transfer to the tray and rub a little oil on top. Repeat with the second portion of dough. Put the rosemary, sea salt and tomatoes on top. Cover the tray with plastic and let sit for 15 minutes to rest.

When ready to bake, put a pan of ice in the oven for 5 minutes. REMOVE THE PAN and place the Stromboli tray in the oven and bake for a total of 45 minutes. After 20 minutes, turn 180 degrees. Bake another 20 minutes, then turn again and bake the remaining 5 minutes. (If it looks like it’s browning evenly, you can probably skip all the turning, I just turned it once towards the end).

Transfer to a new baking sheet lined with parchment. Allow the loaves to cool. Slice and serve with desired dipping sauce.

[ Recipe adapted from Scarpetta’s Restaurant c/o Food Network ]

thursday things

wonton ravioli main

It’s Thursday!

Not quite Friday, but so close I can taste it.

We’ve had a lot going on at work, this is the time of year that we get super busy, so work like crazy all day long, go home, and crash super hard. It makes it hard to do things like, I don’t know, import all those food photos I’ve taken and type up a post. So hard.

As my time becomes more limited I turn to easier recipes, shorter posts, and less pictures. I made these surprisingly good raviolis with wonton wrappers of all things. I had just enough time for BF to snap a pic with his iPad before we devoured them for dinner… I know, I’m pitiful. I wasn’t really even planning on liking/posting the recipe so, whatever. Don’t judge.

Now, they aren’t like regular ravioli. The wonton wrapper is much thinner and more delicate than typical ravioli dough, but I actually enjoyed that. It was like a much lighter pasta that allowed the flavor of the filling to really shine through. I dunno, I liked them. A lot more than I expected to. Especially since I’m not a huge ravioli fan. Boyfriend enjoyed them too, and he is a fan of ravioli, so there must be something good going on there…

Oh, and Thursday’s Serious Eats Sweets lineup also featured my croissants – woot! A picture, by the way, that wasn’t good enough for stupid Tastespotting’s 100×100 pixels. If you have a lot of free time this weekend, you should probably make them. And by probably, I mean definitely. Definitely make them. So good.

Don’t they just look scrumptious?

I’m also dreaming about this cake recipe I saw on Food & Wine, but BFF told me I should probably give the chocolate cakes a rest and make something light and fruity… which I was totally considering until I saw that cake… I mean, it’s just so bizarre… a crunchy almond filling (that when I read, I realized was awful close to a macaron recipe) PLUS peanut butter PLUS rice krispies… I think I have to make it. At this point, I don’t think it’s even my choice anymore. It just has to be done. This is F&W’s picture, not mine. (Obviously, since I haven’t made it yet).

Without further ado, here is a quick ravioli recipe to make while your croissant dough is resting…. I filled mine with a plethora of cheese, only because I went on a recent cheese binge at Trader Joes and we have enough cheese to feed a small country for several weeks… feel free to fill yours with whatever you like. Boyfriend even recommended I fill them with my bolognese sauce or meatballs, but by then they were already closed up and ready to go so maybe next time, love.

My recipe only uses half the wonton wrappers, partly because I wanted to experiment with the rest, and partly because I got tired of making them. Feel free to double the recipe (but stick with one egg) if you want more ravioli. These are estimates, just shove whatever you want in there, it’ll be fine 🙂

Wonton Raviolis

[ Printable Recipe ]

  • 1/2 package wonton wrappers
  • 1/2 lb ricotta (use full fat, it has SO MUCH MORE flavor)
  • 1/4 cup each parmesan, pecorino, fontina… whatever else you like.
  • 1/2 tsp Italian seasoning
  • generous sprinkle of salt
  • any other additions you want to add (cooked italian sausage, prosciutto, whatever)
  • 1 egg, lightly beaten + additional egg for egg wash

1. Mix together ricotta, cheeses, herbs, salt, 1 egg, and any other fillings you may want to add.

2. Lay out wonton wrappers and place about 1 teaspoon of filling in each.

3. Make egg wash by beating your additional egg with one tablespoon of water. Rub egg wash around the outside of each wonton wrapper, folding each wrapper in half as you go. Make sure you press around the filling first, and then press the edges together. Get as much air out of the filling as possible to ensure your ravioli don’t burst while cooking.

4. Store in refrigerator up to one day or freeze** until you feel like having ravioli.

5. When ready to cook, bring a pot of salted water to a boil and reduce heat so that the water isn’t at a violent rolling boil, but more of a gentle simmer-y boil. Drop ravioli in a few at a time and cook for about 3 minutes each, until they float to the surface. Remove with a slotted spoon into a separate pan with your warmed sauce as they finish, adding more as necessary until they are all cooked. Remember to be gentle, since the “shells” for these ravioli are so thin that they will tear or burst more easily than regular ravioli. 

I boiled my ravioli, transferred them to a wide bottomed pan with warm sauce and spooned the sauce over them, then drizzled them with a tiny bit of oil, and garnished with fresh basil. It was delicious. 

**To freeze ravioli, line a large plate or baking sheet with parchment and place sealed ravioli in a single layer. Freeze until firm and then transfer frozen ravioli into a freezer safe bag. To cook, bring water to a gently boil cook ravioli until they float to the surface.