chocolate chip toffee shortbread cookies

DSC_0193-toffee-shortbread-cookie

One of my favorite cookie recipes of all time is this soft and chewy toffee chip cookie recipe from Serious Eats. I almost always have a batch tucked away in the freezer ready for last-minute guests to enjoy. So, naturally, while I was picking out recipes for my 2014 treat boxes, this one from The Kitchn caught my eye.

This recipe kept the same flavor profile (chocolate + toffee) that my usual treat recipients love, but with a new delivery method: shortbread!

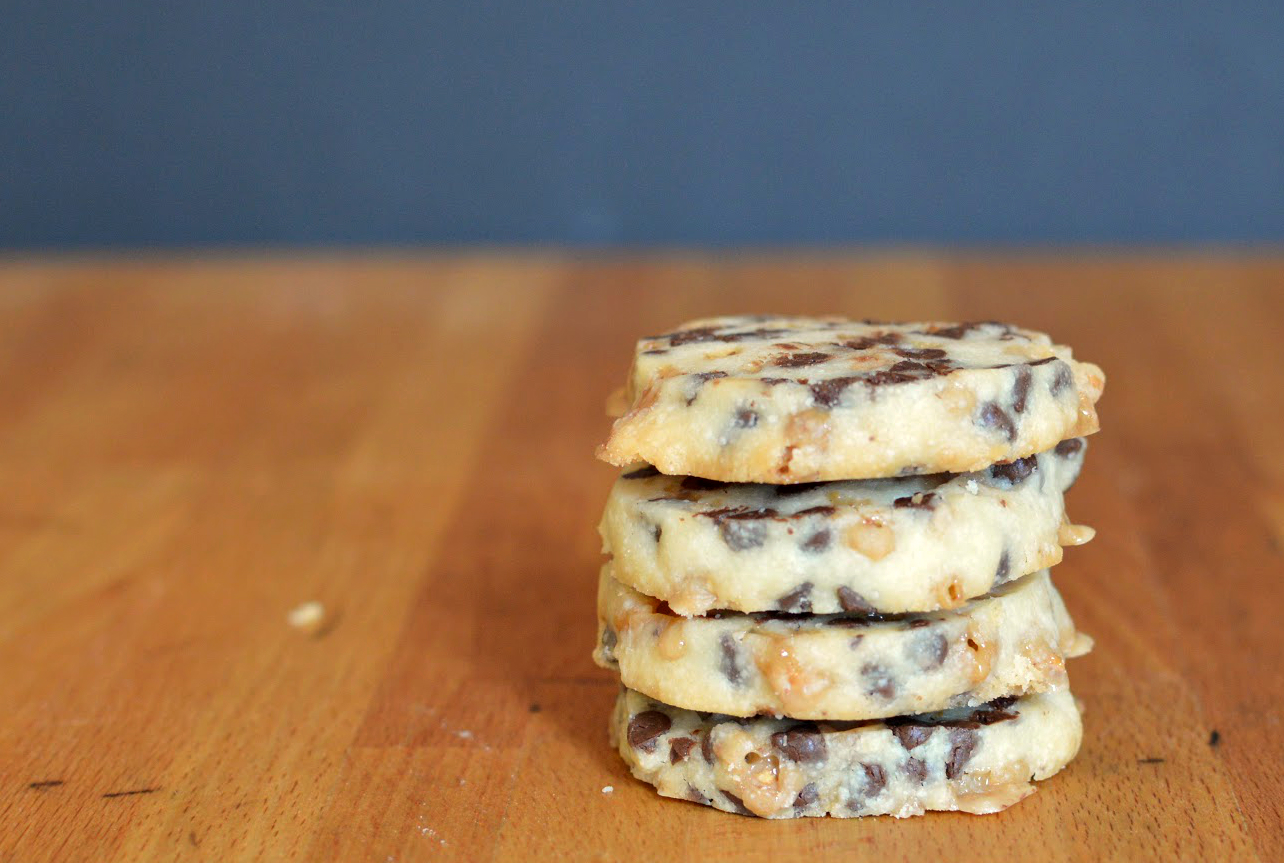
The crumbly shortbread is a great complement to the melty, sweet chocolate and crunchy toffee bits. These cookies, much like their soft and chewy siblings, were an absolute hit. Everyone who received them raved about them, and I’ve already gone through most of the “bumper crop” that was stashed in the freezer, which means you should probably make some of these ASAP. You could even get creative and roll them into a football shape for that big football game that is coming upl in a couple of weeks!

chocolate chip toffee shortbread cookies

Ingredients

  • 1 cup unsalted butter, softened
  • 1/2 cup powdered sugar, sifted
  • 1/4 teaspoon salt
  • 2 teaspoons vanilla extract
  • 2 cups all purpose flour
  • 1 cup mini semisweet chocolate chips, divided
  • 1 cup Heath toffee chips

Instructions

    Mixing:
  1. In a stand mixer with the paddle attachment, cream the butter until soft. Add powdered sugar, and salt and continue beating at medium speed until pale and fluffy. Scrape down the sides of the bowl and add the vanilla extract, beating until combined.
  2. On low speed, mix in the flour until the dough comes together. Add the chocolate and toffee chips and mix just until combined.
  3. Divide the dough in half and shape each half into a log about 1 foot long and 1 1/2 inches in diameter. Wrap both logs in parchment or plastic wrap and secure the ends. Refrigerate the rolls until firm. If baking more than 3 days later, place dough in freezer to stay fresh and thaw in the refrigerator overnight prior to baking.
  4. Baking:
  5. Preheat the oven to 350°F with a rack in the top third and bottom third of the oven.
  6. Line two baking sheets with parchment.
  7. Using a sharp knife, slice the logs into 1/2-inch thickness and arrange about 1 inch apart on your prepared baking sheet. (They won't spread much).
  8. Bake the cookies for 12 to 15 minutes, rotating the pans once, until the edges are firm to the touch and just barely brown. Let the cookies cool completely on the baking sheets to prevent breaking.
  9. Store at room temperature in an airtight container for up to 5 days.
https://wee-eats.com/2015/01/20/chocolate-chip-toffee-shortbread-cookies/

[ Recipe from: TheKitchn ]

toffee shortbread cookies - wee eats


peppermint bark

DSC_0203-peppermint-bark

Since I couldn’t share my holiday basket recipes with you in December (that would have spoiled the surprise for the recipients!), I’ve decided to share them with you in January! Here’s a quick peek at what we’ll be covering…

IMG_9051-baskets

  • Gingerbread blondies
  • Peppermint bark
  • Parmesan-thyme crackers
  • Cheddar crisps
  • Cinnamon-apple bourbon
  • Toffee chip shortbread cookies

Today’s topic: Peppermint bark.

The first time I had peppermint bark was years ago at Williams Sonoma and at almost $30 a pop I limited myself to their free samples and other, cheaper, knock-off varieties of the holiday treat. While I was thinking about what to put in my 2014 baskets, I realized that I still had a good amount of Chocoley laying around and thought it would be perfect some holiday bark!

You can use any chocolate you like, of course, but I’ve already told you about how I love the snap of Chocoley’s Candy Molding formula, which makes a nice sturdy base for this bark without having to temper the chocolate at all. Just melt and pour, then top it with some white chocolate and a generous sprinkling of crushed candy canes on top and voila! You have a whole sheet-pan of peppermint bark for a fraction of what you would pay for the tiny bit you get from Williams Sonoma one!

peppermint bark

Ingredients

  • 14 ounces dark chocolate, chopped
  • 1 1/2 teaspoons peppermint extract
  • 14 ounces white chocolate, chopped
  • 3 candy canes, chopped or crushed

Instructions

  1. Line a sheet pan or 9-by-13 pan (for neater corners) with aluminum foil and/or parchment, smoothing out any wrinkles.
  2. Melt dark chocolate over just steaming water in a double boiler. (Alternatively, you can melt the chocolate in the microwave in 30 second intervals at 50% power, stirring in between each session).
  3. Stir in the peppermint extract and pour into prepared pan, spreading to form an even layer. Set in the fridge to firm up while you melt the white chocolate.
  4. In a separate bowl, melt the white chocolate in the same manner as the dark chocolate (it may take less time).
  5. Remove dark chocolate layer from fridge and pour white chocolate over the dark chocolate layer, spreading the white chocolate to form an even layer. Sprinkle with candy canes and return to fridge for about 10 minutes to set up.
  6. Set on the counter to continue firming up, about one hour, then cut into desired size chunks.
  7. Store in an airtight container at room temperature.
https://wee-eats.com/2015/01/11/peppermint-bark/


chocolate chip almond muffins

almond muffin 0084

Apparently December is brunch month for me – with pain au chocolateapple pie biscuits and cinnamon-almond scones and now… muffins! Sure everyone else is helping you make Christmas cookies but here at Wee Eats we are committed to ensuring you are covered for your most important meal of the day.

These muffins are adapted from Monica over at Playing with Flour. She’s got tons of gorgeous goodies over on her blog, I highly recommend you stop by and check her out!

almond muffin 0101 horiz

These are not those big, dense muffins from your nightmares. The almond flour in these muffins give them a remarkably light crumb, they have a touch of sweetness, and then sliced almonds on to give them a nice little “crunch” as if to say “Good morning, Sunshine!”

Although her recipe calls for orange zest, I left it out because I’ve never really been into that whole chocolate-orange thing. Instead, I added a dash of almond extract to complement the almond flour and sliced almonds, and took these guys another route.

almond muffin pin 2

chocolate chip almond muffins

Prep Time: 15 minutes

Cook Time: 15 minutes

Total Time: 30 minutes

Yield: 12 to 15 muffins

Ingredients

  • 1 1/2 cups all-purpose flour
  • 2 teaspoons baking powder
  • 1/2 teaspoon baking soda
  • 1/4 teaspoon kosher salt
  • 1 cup mini chocolate chips
  • 1/2 cup sugar
  • 1/2 cup almond meal
  • 1 stick cold unsalted butter, cut into 1/2-inch cubes
  • 2 large eggs
  • 1 teaspoon pure vanilla extract
  • 1/4 teaspoon almond extract (optional)
  • 1 cup buttermilk, shaken
  • 1/4 cup sliced almonds

Instructions

  1. Preheat oven to 400 degrees and line a muffin tin with liners. Grease liners, if desired, to aid in easy removal of muffins.
  2. Whisk the flour, baking powder, baking soda, and salt together in a medium bowl. Add the mini chocolate chips and toss to coat with the flour mixture.
  3. Place sugar and almond meal into the bowl of a stand mixer fitted with the paddle attachment. Add butter and beat on medium-high speed until fluffy, about 1 minute.
  4. Add eggs, one at a time, beating until incorporated scrape down the sides and bottom of the bowl with a rubber spatula.
  5. Add vanilla and almond extracts, then add the buttermilk and beat on low speed until combined.
  6. Remove bowl from stand mixer and add the flour mixture. Fold flour mixture into wet mixture, stirring just until combined.
  7. Scoop batter into the prepared muffin cups (the batter will be very stiff), filling them nearly to the top and sprinkle with the sliced almonds.
  8. Bake until muffins are lightly browned and a toothpick inserted into the center comes out clean, about 12-14 minutes. Let muffins cool in the pans on a wire rack for about 5 minutes, then remove them from the pans and set onto the rack to finish cooling.
https://wee-eats.com/2014/12/16/chocolate-chip-almond-muffins/

[ Recipe adapted from: Playing with Flour ]

halloween candy bark

choco bark 0181

Halloween is tomorrow and since I’ve been 1,896 miles from home for the past week, sadly I haven’t had time to create a Halloween costume.

I have, however, managed to carve a pumpkin – Hubby and I started this tradition just last year, neither of us having carved pumpkins for many years.

pumpkins

In my time away over the last five days I’ve enjoyed a bit of actual autumn weather, got to see some fall colors, and walked 25.25 miles through the trails surrounding the beautiful Chateau Elan in Braselton, GA, while away at work conference. And yes, my legs are very, very sore.

I also learned the bad news from my beloved that, despite following the advice of a trusted website, our pumpkins have already turned to rotting mush in record time and will not be making it to Halloween… It turns out that peppermint soap thing actually does the opposite of preserving your pumpkin.

chateau elan

So today, as I am sitting on a plane hurdling towards home (and 90 degree weather) at 500mph (or around there), anxiously awaiting my return home, I am also mourning the loss of our beloved pumpkins, and have every intention to drown the sorrows of our loss in this bark.

Just like the last bark, I used the sturdier candy molding formula for the base layer of bark because I love the snap it gives the chocolate. I also went with an extra dark chocolate for the base to provide a good contrast to the sweeter milk chocolate flavor for the second layer.

After spreading the second layer of chocolate, I adorned it with some of my favorite candies and a sprinkle of crushed potato chips and set it in the fridge for a few minutes to set up. Start to finish (including chopping time) I was done in under 30 minutes which isn’t bad at all if you ask me.

choco bark 0163

Even though one day is plenty of time to make this bark in time to hand out for Halloween, it would be an excellent way to use up all of your leftover Halloween candy as well.

I included my favorite candies in the recipe below, but feel free to use whatever candy you find in the bottom of your (or your kid’s) trick-or-treat basket.

halloween candy bark

Total Time: 30 minutes

Yield: one 18 by 12-inch half sheet pan of bark

Ingredients

  • 2 cups dark chocolate (I used this candy molding formula from Chocoley)
  • 2 cups milk chocolate (I used this dipping and coating formula , which is a bit thinner than the candy formula)
  • 2 Tablespoons creamy peanut butter (go with a regular standard peanut butter that won't separate, I always use Jif)
  • 1/2 cup mini peanut butter cups; chopped (I used a mix of Trader Joe's dark chocolate and milk chocolate peanut butter cups)
  • 1/2 cup mini Oreos (I used mini Reese's Oreos), coarsely chopped
  • 1/2 cup mini Reese's Pieces
  • 1/2 cup potato chips, roughly crushed
  • 2 Tablespoons sprinkles

Instructions

  1. Melt dark chocolate in double boiler or microwave. Pour melted chocolate onto parchment-lined baking sheet and set in the fridge to solidify, about 5 minutes.
  2. Melt milk chocolate in a double boiler or microwave and stir in peanut butter until fully incorporated. Pour over hardened chocolate and spread to cover.
  3. Working quickly, before the top layer of chocolate hardens, sprinkle with assorted toppings (I listed them in the order I sprinkled, but that's not necessary) and place into fridge to harden for about 5 to 10 minutes.
  4. Remove bark from refrigerator and cut into pieces.
https://wee-eats.com/2014/10/30/halloween-candy-bark/


candy corn halloween bark

corn bark 0137

Halloween is right around the corner, making this the perfect time to make your own candy! Even if you’ve never made candy before, literally anyone can make a killer bark.

Though I’ve included a recipe for the bark that I made, no real recipe is needed. Just like with any other recipe, though, you will want to think about balance. If you follow a single flavor profile, your bark will end up tasting a bit flat. You might not know what it is missing, but you will definitely know that something is missing. A good place to start is with something sweet, something crunchy, something salty, and go on from there.

For this bark I wanted to stick with Halloweeny flavors, so I started off with candy corn for sweetness, pretzels for crunch, pumpkin Joe-Joe’s (From Trader Joe’s), and then sprinkles just to make it pretty. Since I was using white chocolate for the top layer, I stirred a tiny bit of orange gel food coloring into the white chocolate once it was melted, because everyone knows that Halloween things are better when they’re orange.

corn bark 0146

To make sure I got a good “snap” from my bark, I used Chocoley’s candy molding formula for the bottom layer of chocolate. I love using their candy molding formula for projects like this because it gives you a great sturdy base with the snap of a tempered chocolate without having to actually temper any chocolate. Then, for the top layer, I used their dipping and coating chocolate formula. That formula is a bit thinner than their candy formula and so it sets up a little bit softer, but either one would work perfectly.

If you plan to use another type of chocolate, TheKitchn has a nice thermometer-free tutorial, or David Lebowitz has a more in-depth “how to” for tempering chocolate on his site.

Since I used a couple of items (candy corn and pretzels) that aren’t prone to snapping along chocolate’s natural fault lines, I chose to cut this bark with a knife. That allowed me to get nice, clean cuts with my pretzel and candy corn pieces on each piece of bark.

candy corn halloween bark

Yield: one 18 by 12-inch half sheet pan of bark

Ingredients

  • 2 cups dark chocolate melting chips (I used this candy molding formula from Chocoley)
  • 2 cups white chocolate melting chips, (I used this dipping and coating formula , which is a bit thinner than the candy formula)
  • 1 cup candy corn
  • 1/2 cup pretzels, coarsely chopped
  • 1/2 cup sandwich cookies, chopped
  • 1 Tablespoon sprinkles

Instructions

  1. Melt dark chocolate in double boiler or microwave. Pour melted chocolate onto parchment-lined baking sheet. Set in fridge to solidify, about 5 minutes.
  2. Melt white chocolate in a double boiler or microwave. Pour over hardened chocolate.
  3. Working quickly, sprinkle with assorted toppings and place into fridge to harden, about 5 to 10 minutes.
  4. Cut or break into pieces (I cut mine since I had larger toppings that weren't likely to divide evenly if I just broke the chocolate into pieces)
https://wee-eats.com/2014/10/27/candy-corn-halloween-bark/