asian steak salad

dsc_5228

So, despite my last post being insanely delicious, I’m told that it is the start of a “new year” and that some people have things called “resolutions” and that in these “resolutions” some people, so I’m told, are trying to be more healthful. Silly me. Ruining your diets before you even start them. How dare I.

So, in your honor, those of you who have what’s called “self control” and are trying to be more healthful, I give you a (relatively) “light” meal. All the benefits of salad – being full of healthy veggies and having lots of greens to fill you up, with the added taste of a nice (LEAN) juicy steak right on top.

Now, please do not make the same error I made. Do not walk away from the grill with no concept of what time it is and allow your steak to just cook and cook away. Is it a big deal? Not really, but this steak really should have been medium-rare to medium. So be a good girl (or boy) and cook your steak over high heat for about 5 – 6 minutes per side, then tent it with foil and let it rest about 10 minutes afterward. Slice against the grain and lay atop your bed of greens.

Asian Steak Salad

[ Printable Version ]

For the meat:

  •     2 Tablespoons soy sauce
  •     2 Tablespoons oil (olive oil or vegetable will do)
  •     1 Tablespoon red wine
  •     3 cloves garlic, minced
  •     2 teaspsoons brown sugar
  •     1 1-pound flank steak

For the dressing:

  •     2 Tablespoons soy sauce
  •     2 Tablespoons oil
  •     2 Tablespoons sugar
  •     1 Tablespoon lime juice
  •     2 cloves garlic, minced
  •     1 Tablespoon ginger
  •     1 scallion, finely diced

For the salad:

  • Salad greens
  • 1 cucumber, sliced
  • ½ medium red onion, sliced

1. Marinate your meat by mixing together the soy sauce, oil, brown sugar, wine, and garlic. Pour over meat and let marinate at least 30 minutes. (I do this while it’s coming to room temperature)

2. While the meat is marinating, make your dressing by combining all of the dressing ingredients, including the scallion, mixing well. Taste and adjust, if it tastes flat try a dash of vinegar.

3. About 10 minutes before you’re ready to get cookin’, turn on your grill. Heat to high heat (about 550 degrees F). Cook the flank steak to medium-rare (about 5-6 minutes each side). Once done, transfer steak to plate and tent with foil for ten minutes while it rests.

4. Once the steak is done resting, cut against the grain into thin slices. For more even distribution, you can toss your salad with some of the dressing before plating, then place the steak over your salad veggies and drizzle with additional dressing if necessary.

Eat & enjoy… maybe think about using the left over steak for stir fry tomorrow… now that you think about it, that marinade would probably make a pretty good stir fry sauce… Let’s use brown rice instead of white, in the interest of being “healthful”. 😉

Favorite Turkey Burgers

I can’t believe that just a few short weeks ago, there was snow-topped mountain in the view of my kitchen window… For those of you who think all mountains are snow-capped, those surrounding the Phoenix valley are (almost) never graced … Continue reading

Healthy(er) Bolognese

healthy bolognese

Bolognese is one of my favorite pasta sauces. The best bolognese I’ve had comes from one of my favorite restaurants—Café Bink! One thing that always puzzled me was just how they achieved such a fine texture with their sauce, I just assumed it came from grinding their own meat. Then BF had a great idea- why not try my shiny, new immersion blender to grind my chunky meat sauce into something finer! (duh) It worked like a charm! I’m sure it’s much healthier for me than Bink’s, anyway, using turkey sausage and extra lean ground beef as its main components.

That’s my Penzey’s “Sandwich Sprinkle” in the background, I used it to help season my toasty garlic bread. I used Farfalle for this particular occasion, because it’s cute. See how cute the little bow-ties are? I should’ve bought the mini farfalle, everything is even cuter when it’s mini… maybe next time…

So here’s a relatively quick & easy Bolognese, make sure to read all the way to the end for helpful tips!

Pasta Bolognese

Printer-Friendly

  • 1/2 pkg sweet or spicy Italian sausage (I use turkey), casings removed
  • 1 lb ground beef (I use 97% lean)
  • 1 medium onion, finely diced
  • 1 medium carrot, finely diced
  • 1 stalk celery, finely diced
  • 3-4 cloves garlic, minced
  • 1 c red wine (or 1 c beef stock, or ½ c each)
  • 1 tsp Italian seasoning (or 1/2 tsp each dried oregano, basil, and parsley)
  • ½ – 1 tsp red pepper flakes (optional)
  • 1 28 oz can whole or crushed tomatoes
  • Splash of heavy cream & very small dash of ground nutmeg (optional, but strongly recommended)
  • 1 box pasta (or desired amount), cooked in salted water
  • Salt & Pepper
  • Olive Oil (or other neutral oil)

1. In a large sauté pan or dutch oven heat oil over medium/med-high heat. Add both meats and cook until well-browned, breaking up into small pieces. If necessary, drain excess fat.

2. Add onion, carrot, celery, and a dash of salt and pepper. Cook until soft, but not quite browned. Add garlic & red pepper flakes and cook until fragrant (just about a minute).

3. Add red wine and/or beef stock and deglaze pan, scraping up all the brown bits and mixing well. Simmer until wine is reduced by half.

4. Reduce heat to low and add tomatoes, breaking up with spatula or spoon if necessary (be careful- they squirt!) Allow to simmer, covered, for 30 minutes or several hours, checking occasionally to stir and add broth or water if it’s drying out (it shouldn’t be). It should be simmering, not boiling, so be sure the heat is low.

5. About 10 minutes before serving, add a splash of heavy cream, stir to incorporate. Adjust seasonings as necessary (sometimes, a splash of balsamic vinegar can brighten the sauce if it’s tasting a bit flat). Cover with lid slightly ajar and allow to simmer 10 minutes longer.

6. Toss with cooked pasta, top with fresh basil and fresh-grated parmigiano-reggiano cheese.

Tips

* Using an immersion blender, slightly puree the sauce to an even consistency—be careful not to go too far, or the sauce will resemble baby food and be much less appealing

-A food processor is a messier, less-safe way to accomplish the same task

*You can substitute 1 Tb ea fresh basil and parsley in place of the dried Italian seasoning or 1/2 tsp ea parsley, basil, and oregano.

*I recommend an enameled pan since stainless steel can sometimes make the sauce taste “tinny”- I will admit I made this batch in my AC Stainless Steel Saute and it was delish though 🙂

*As always, feel free to add more veggies if you like to stretch the sauce, though you may need to add more canned tomatoes (or a small can of ‘tomato sauce’ or ‘crushed tomatoes’)

*If the sauce tastes a little “flat”, try adding a teaspoon of sugar or a dash of balsamic vinegar to brighten the flavor.

*Since I’m usually only cooking for two, and this makes a lot of sauce, I usually freeze the extras in 2-person portions in Ziploc bags, which makes it easy to take out and re-heat on those nights when I just don’t have the time or energy to cook.

It’s a Wrap!

wrap

Chicken wraps are one of BF’s favorite dishes, so they’re a regular on our dinner table . I had been slacking over the winter since, even though I’m in Arizona, I still like to eat my cold-weather, hearty, wintery foods that I used to eat in Ohio. I like to pretend that 60 degrees is “cold” and eat a nice, warm bowl of chili or soup, but it’s hard not to take advantage of the ability to grill in early March on a warm, sunny day.

chopped veggies to keep my chicken company

These wraps are very versatile, and probably next to impossible to mess up. We used to call them “greek” wraps, even though there’s nothing really “greek” about them. But since we put the chicken in a pita, and usually used hummus and/or tzatziki, and feta- “greek” became the adjective. Call them whatever you want, I call them “tasty.”

Chicken Wraps

Printer-Friendly

  • 2 boneless/skinless chicken breasts, butterfied or sliced into 2 thin pieces each
  • 1 large (or a couple small) lemons
  • ½ tsp each: Turmeric, Oregano, Garlic Powder, and Onion Powder
  • ¼ tsp each: Paprika, Salt and Pepper; Pinch of cayenne (optional)
  • Olive Oil
  • Desired Veggies (I recommend lettuce, red onion, tomato, and cucumber)
  • Optional Sauces (Hummus, Tzatziki, or Pesto)
  • Feta
  • Flour Tortillas

*If you can find them- get the raw tortillas that you cook at home, ‘Tortilla Land’ is usually in the refrigerated section of the grocery store. I think ‘Guerrero’ sells some that aren’t refrigerated and are just hiding amongst the rest of the tortillas)You could also use pocket bread, lavash, or pocket-less pita… all will work equally well.

1. Mix equal parts lemon juice and olive oil & add the rest of the seasonings. Pour into Ziploc bag or glass bowl. Salt and pepper both sides of the chicken, then add to the marinade and toss to coat. Allow to marinate for about 30 minutes.

2. Now is a good time to cook your tortillas and wrap them in foil to stay warm. Also to chop your veggies to desired size and set aside.

3. Grill chicken until thoroughly cooked (since it’s thin, it should only take a couple minutes on each side). Once cooked, set aside and tent with foil to rest.

4. Once chicken is rested, slice or dice to desired size, and fill wrap with chicken, veggies, sauce, and feta cheese. Eat & enjoy!

Tips:

*Toss the lettuce in vinaigrette for added flavor

*You don’t have to slice your chicken breasts thin, I just prefer to do it so that they both absorb the marinade and cook faster.

Move over, Manwich. There’s a new Joe in town!

joe

Sloppy Joe’s have had a tough life. Like an old toy that’s been forgotten in the attic, no one wants to play with him. I don’t even think the grocery store carries an off-brand version of sloppy Joe seasoning. When you think of sloppy joes, you invariably think of Manwich, then you think: “YUM, YES PLEASE” or “GROSS GET IT OUT OF MY FACE!” Poor sloppy joes are so neglected. As though Manwich has the recipe so perfected that there is no need to create any variation.

Joe’s not generally found on a restaurant menu and your mother probably doesn’t have her own “secret recipe”, but why not?? What did Joe do to make everyone so mad at him? No one wants to experiment. No one wants to make him their own. It’s just brown meat, open can of Manwich, warm and serve. What did poor joe do to make him so disrespected that no one even thinks of giving him a second chance? There are as many salad dressings, barbeque sauces, and sandwich spreads as there are crayola crayon colors, but just one lonely Joe… poor guy. Don’t worry, Joe. I still love you. I will make you my own, and give you my very own (not) secret recipe…

People don’t generally think of sloppy joes as being customizable, but I beg to differ. Ever since I first discovered the smoky, spicy, little guy, chipotle has been my latin lover. Boyfriend loves chili-garlic, that spicy pepper sauce you see sitting in jars at the asian restaurant. Both of those are welcome additions to sloppy joes, trust me- I know.

So here is a basic sloppy joe recipe that is really easy to whip up, and then you can customize it to your liking. If you want it a little smoky- throw in chipotle. Spicy? Hit it with some cayenne or chili-garlic paste. You love manwich? Omit the brown sugar and add some BBQ sauce instead and you’ll be surprised at just how closely it matches Manwich- it could be his evil twin… and if you want to stretch it out to feed a large family or make it healthier- double up on the veggies. Just experiment, have fun, and find what works for you. This is a good jumping-off point, though.

*Tip: The finer you chop your veggies, the better texture they’ll have. Also, you don’t need to saute them all the way to tender, they’ll soften up a lot as it simmers.

Sloppy Joes

Printer-Friendly

  • 1 lb lean ground beef
  • 1 small carrot, finely minced
  • 1 small onion, finely minced
  • 1 small red bell pepper, finely minced
  • 2 cloves garlic, finely minced
  • 1 8oz can tomato sauce
  • 1 tsp mustard
  • ½ c ketcup
  • 3 – 4 tsp brown sugar (to taste) or 1 Tbsp BBQ sauce
  • 3 dashes worcestshire sauce (or soy sauce would probably do the trick)
  • Dash each (about 1/4-1/2 tsp) of garlic powder, onion powder, paprika
  1. In a saute pan, heat oil over medium-high heat. Once hot, add meat. Cook, breaking into small pieces, until well-browned. Add chopped veggies, a dash of salt and pepper, and cook until veggies are slightly softened (but not brown).

sauté away

  1. Once meat and veggies are cooked, turn heat down to simmer and add a bit of water to de-glaze the pan. Add the rest of the ingredients, mixing well. Cover with lid and turn heat all the way down to simmer.
  2. Simmer, covered, for about 20 minutes—checking every so often to make sure it’s not drying out—add water or a bit of stock if it starts to look dry.

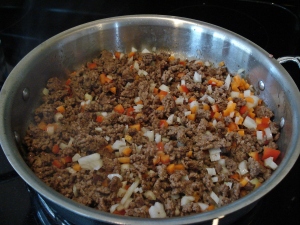
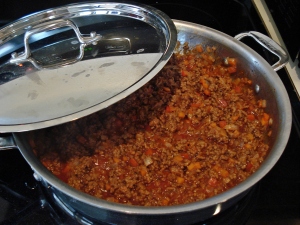
lookin good!

  1. After 20 minutes, adjust seasonings to taste & serve!

*I believe almost everything sauce-related tastes better the 2nd day, once the flavors have had time to mingle. After simmering, I transfer the joes to a heat-safe container and refrigerate overnight. Reheat on the stovetop in a covered saucepan over low heat, adjust seasonings to taste and serve then! (I like mine with a little bit of cheese and potato chips on top)