stuffed peppers

stuffed-pepper-wee-eats.com_

I DID IT! I SURVIVED THE WHOLE 30!

And to celebrate, I saved the best (recipe) for last. This recipe was by far the FH’s favorite Whole30 recipe. In fact, I just made a huge batch of the filling so that we could enjoy these stuffed peppers later this week, even though we aren’t even on the diet anymore!

To make this “W-30 compliant”, I used cauliflower “rice” instead of real rice. These are super delicious as-is, but if you feel like that’s not something you’re into, feel free to replace the cauliflower with cooked rice or quinoa (or orzo, any grain of your choice).  I also recommend topping these with cheese, which I may very well do later this week now that I’m allowed to have cheese again. (Hi, cheese!)

As another bonus, this recipe makes a ton of filling. A ton.

So, if you don’t feel like eating 6 stuffed peppers today, you can make a couple peppers tonight and freeze the rest of the filling for your future self. You know that one, the one who comes home late and has no time to make dinner… yeah, that one!  Or you can make the whole recipe and eat them throughout the week – the leftovers reheat great in the microwave. Just pop them in the microwaved (covered, of course, otherwise you may anger your household microwave-cleaner) for about 2 minutes and Voila – just as good as new!

stuffed peppers

Prep Time: 30 minutes

Cook Time: 30 minutes

Total Time: 1 hour

Yield: 6

Serving Size: 1 stuffed pepper half

Ingredients

  • 1 pound lean ground beef or turkey
  • 1 pound (1 medium head) cauliflower, riced
  • 4 large bell peppers, halved with seeds and stems removed
  • 1 jar tomato sauce (I really liked this one )
  • 1 large onion, minced
  • 4 cloves garlic, minced
  • 1/4 cup low-sodium chicken or vegetable broth
  • 1/4 cup fresh parsley, minced
  • 1/4 cup fresh basil, minced
  • 1/2 teaspoon red pepper flakes, optional
  • Salt & pepper, to taste

Instructions

    For the peppers:
  1. Preheat oven to 375F
  2. Place two halves of a pepper, cut side up, onto a microwave-safe plate and cover with wrap. Microwave for 2 minutes until just starting to soften. Repeat with remaining halves of peppers; set aside until ready to fill.
  3. Prepare a 9-by-13-inch baking pan by spreading a thin layer of tomato sauce on the bottom of the pan.
  4. For the filling:
  5. In a large saute pan over medium-high heat, cook the ground beef or turkey with a generous pinch of salt until well-browned.
  6. Meanwhile, finely chop one of the bell peppers. Add onions and chopped bell pepper to ground meat and cook until soft, about 5 to 7 minutes. Add garlic and stir to prevent burning. Cook just until fragrant, about 30 seconds more.
  7. Add half to 3/4 of the cauliflower "rice" (it should make up about half of your total mixture) and another pinch of salt. Add chicken broth and stir to combine, scraping up any browned bits from the bottom of the pan.
  8. Reduce heat to medium and cover loosely with foil to allow cauliflower to steam. Cook about five minutes then stir again. Continue to cook another 5 minutes uncovered, allowing any remaining liquid to cook off, stirring occasionally.
  9. Reduce heat to low and add about a half jar of tomato sauce (just enough to moisten the mixture) along with the parsley, basil, and red pepper flakes. Stir to combine and let simmer about 10 minutes. Taste and adjust seasoning with salt and pepper as needed.
  10. Assembling the peppers
  11. Place peppers cut-side-up into baking dish. Fill with meat and cauliflower mixture. Top with more tomato sauce and cheese, if desired.
  12. Bake, uncovered, 30 minutes* until peppers are tender.
  13. * If baking from chilled, bake covered for 30 minutes then uncovered for the last 10 minutes.

Notes

Feel free to use cooked rice, quinoa, orzo (or any grain you like!) in place of the cauilflower - I made this for the Whole 30 where grains were outlawed so I wasn't allowed to.

Also outlawed on the Whole 30 was cheese, but these would be even better with a bit of mozzarella, fontina, or provolone mixed in (and on top).

https://wee-eats.com/2014/07/01/whole-30-grain-free-stuffed-peppers/

savory beef empanadas

edit empanadas 4-2

When we make Mexican food at our house, it’s usually tacos or fajitas.  Something fast and easy.  What I have failed to realize all this time, is that with a little bit of preparation, empanadas can be that fast and easy dinner.

You see, I’ve been working a little bit of a later shift lately, and so I’ve been looking for things that are not only quick and easy dinners, but that the BF can easily prepare as well.  These fit the bill perfectly.  With just about 30 minutes of work over the weekend, I can have 10 empanadas in the freezer waiting to be devoured.

This weekend, we devoured them as a midday snack.

To make the recipe even easier, I found frozen empanada dough in our grocer’s freezer.  Next to these curious creatures:

edit DSC_0439

Have you ever seen these?  I’d been eyeing these little guys for awhile, I have to admit that the idea of not wasting money by constantly buying fresh herbs “just in case” I need them is very appealing to me.

I try to keep fresh herbs around, in the fridge or on the windowsill, but I swear that 9 times out of 10 by the time I go to use them they are already wilted and dead (I’ve got parsley on the windowsill now, wilting away as we speak!).

All that money can really add up, so the thought of always having fresh herbs within an arm’s reach sounds like something out of a dream.

edit DSC_0442

My first thought when I popped out my cube of garlic, “What’s that funny smell?”  Am I the only person who smells all of their ingredients?  It can’t just be me.  A quick glance at the ingredients list and I saw it’s not just garlic, they are suspended in a cube of oil, salt, and lemon juice, I assume for freshness.

I would be lying if I if I said that I wasn’t at least a little worried that my empanadas were going to taste funny.

Luckily, making the filling is just about as easy as browning beef, so I figured if they tasted funny I would just make a new batch and life would go on.  The good thing about empanadas is that, unlike with baking, you can taste your filling as you go so you will have a pretty good idea of what your finished product is going to taste like.

That being said, I was relieved when I tasted the filling… no sign of that funny smell.  Maybe that’s just what frozen garlic smells like, I’m not a frozen garlic expert or anything.  The best part?  I didn’t even have to smell garlicky fingers all night long like I would if I had minced the garlic by hand.  Garlicky fingers are the worst.

Garlic cubes = Success! I also picked up a package of basil cubes that I think I will try in my next tomato sauce.

edit empanadas 1


I made these empanadas last week; I baked a few fresh and then we baked some from frozen this weekend as a snack.  I don’t know if the freezer works some sort of witchcraft on them, but the empanadas that we baked this weekend from frozen were even better than the ones baked from fresh!

So, that being said, I’m going to recommend you make yours ahead of time and bake them from frozen.  If you decide to bake them fresh, just know that the ones you freeze are going to taste even better!

In the recipe below, I stated both the cube amounts and the fresh amounts for the garlic and cilantro that I used.  If you’d like to make your empanada dough from scratch, you can find a recipe here and here, but I can’t vouch for either of them.  I can vouch for the frozen dough I used, as it was super easy and it baked up super crisp and flaky, and even stayed crisp after I had to stash some leftovers in the fridge.

Also, I can already see that you’re thinking about leaving out the cheese.  Trust me, you need the cheese, don’t leave it out!  You can substitute some of that pre-shredded Mexican cheese if you want but you better put some cheese in there!  I did half of my empanadas with cheese and half without and the ones with cheese were markedly better, even though they didn’t necessarily taste “cheesy.”

Also, if you’d like a little more “control” over the flavor, you could probably substitute tomato sauce or diced tomatoes (I’d recommend fire-roasted) for the “salsa” called for in the recipe.  The filling is entirely customizeable, so don’t be afraid to play around a bit to find the perfect mix for your tastes!

Savory Beef Empanadas

Makes 10 empanadas

Printable Recipe

  • 1 Tablespoon oil, olive or vegetable
  • ½ pound ground beef
  • ½ medium onion (about ¼ cup finely chopped)
  • ½ medium bell pepper, finely chopped
  • ½ cup your favorite salsa
  • 2 cubes garlic (or 2 cloves garlic, minced)
  • 1 Tablespoon chili powder
  • 1 ½ teaspoons cumin
  • ½ teaspoon smoked paprika
  • 2 teaspoons adobo from can of chipotles
  • 1 chipotle in adobo, minced (optional)
  • 1 to 2 cubes cilantro (or 1 to 2 teaspoons fresh cilantro, minced, more or less to taste) (optional)
  • Salt and pepper, to taste
  • ½ cup shredded cheese (I used ¼ cup sharp cheddar + ¼ cup monterey jack)
  • 10 empanada shells, I found frozen ones at my grocery store
  • 1 egg, lightly beaten (for egg wash)

1.  Heat oil in a pan over medium high heat.  Add beef and cook until well-browned.  Add onion and bell pepper and continue cooking until just softened, about five minutes more.  Lower heat to medium low and add remaining ingredients except cheese and shells.  Simmer about ten minutes; set aside to cool.  Once cooled to room temperature, mix in cheese.

2.  Line two baking sheets with parchment.  While working on empanadas, keep unused discs covered with a damp towel to keep them from drying out.  Fill each shell with 1 to 2 tablespoons of filling, then seal tightly by dampening the edge of the disc with water and folding the disc over to create a crescent shape.  Press tightly to seal, or use a fork to press closed.

edit DSC_0319

3.  To freeze:  Place empanadas in a single layer on baking sheet, put in freezer 1 hour, then transfer to a freezer-safe plastic bag for storage.

4.  When ready to bake, preheat oven to 375°F.  Brush empanada tops with egg wash, avoiding crimped edges, and bake 25 to 30 minutes, until golden brown.  Allow to cool slightly before eating.

 empanada pin 2 empanadas pin

[ I occasionally receive discounts or coupons to try products for you.  I received coupons to purchase Dorot spices, which I’d been eyeing for months at the grocery store and would have tried anyway.  All opinions about these spices and anything else on Wee Eats are always entirely my own. ]

stuffed pasta shells

stuffed shells

What’s more comforting than a big tray of pasta on a cool winter night? Answer: Not much. Then again, it’s been in the high 70s here so what do I know about winter? The biggest chill I get is coming out of the air conditioning vents in my car as I drive home from work…

Hey, don’t judge.

I made these stuffed shells for my momma when she came over to celebrate “Second Christmas” with us. She missed out on first Christmas due to circumstances beyond our control, so last weekend I had her come over, open presents, and enjoy a good home-cooked meal.

Half of these were left vegetarian (just for fun), but since I had some extra prosciutto lying around that I didn’t want to waste, the other half had prosciutto added to them. Both were delicious, and show just how customizable this recipe really is. 🙂

As an added bonus, you can make these in advance to bake the next day, or even freeze them for a future dinner! Play around with the flavors, do what you like, but definitely add these to your dinner rotation.

Stuffed Pasta Shells

[ Printable Recipe ]

  • 16 – 20 jumbo pasta shells (you’ll want extra in case when some break)
  • Shredded italian cheese
  • 1 jar of your favorite pasta sauce

For the filling:

  • 15 oz ricotta (I prefer Trader Joe’s, but do what you will)
  • ½ cup grated parmesan cheese
  • 1 large tomato, finely diced
  • ½ medium onion, finely diced
  • 3 cloves garlic, minced
  • Fresh basil, minced
  • 1 egg, lightly beaten
  • 7 oz prosciutto, diced (optional)
  • salt & pepper

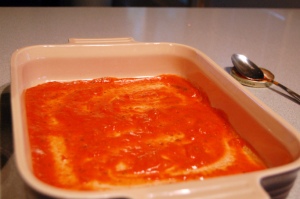
Lightly grease a 9 x 13 baking dish and pour a layer of sauce on the bottom.
If you’re baking these right away, might as well get that oven heated to 350F

1. Bring salted pasta water to a boil, and cook shells according to package directions. When done, spread out on a baking sheet to cool. Try to gently separate any that have fused together.

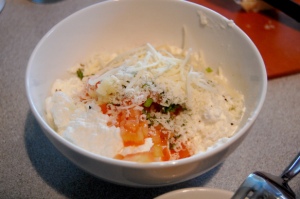
2. In a medium bowl, mix together the filling ingredients adding salt and pepper to taste. Realizing you probably don’t want to “taste” the filling on its own, probably about a ½ teaspoon or so of salt and a few grinds of pepper should do?

3. Once the shells have cooled, fill them with the ricotta mixture and arrange in the baking dish. Top off with more pasta sauce, shredded cheese, and grated parmesan. You can, at this time, either refrigerate the shells (covered) for tomorrow, or throw them in the oven.

4. When ready to cook, bake shells for 30 – 40 minutes, until the cheese is nice and bubbly and shells are heated through.

*If you’re going to freeze them, fill them and place them on a freezer-safe dish. Freeze about 20 minutes until firm, then place in a freezer-safe bag and store in your freezer until ready to use. When ready to bake, cover the bottom of a baking sheet with sauce, place the shells on top, cover with more sauce and cheese, then bake COVERED for 30 minutes, uncover and continue to bake for another 15 -20 minutes until hot and bubbly.