fig and prosciutto flatbread

DSC_7846edit

It’s Monday and I’ve got a treat for you.

It’s one of my favorites.

It combines creamy mascarpone cheese, sweet fig jam, salty prosciutto, and peppery arugula that satisfies any possible craving you could have all in one bite.

Usually I would make this as a crostini on sliced and toasted baguette. Unfortunately, it can become very tedious when you have to spread and layer ingredients onto a bajillion little pieces of bread.  So when I was planning Christmas Brunch, it occurred to me that I could save a lot of time if I just made one giant crostini… I briefly thought about slicing a baguette in half, toasting the halves and going from there, similar to my cheesy artichoke bread recipe.

Then, as I was scanning the fridge to find something for dinner, my eyes stopped on a package of pizza dough from Trader Joe’s.  It came to me all at once, it was so simple I couldn’t believe I hadn’t figured it out before: flatbread!

DSC_7857edit

Flatbread was the solution to my problem.  (How many people can say that?)

I could make one large flatbread and just cut it into a bunch of bite-size appetizers for people to snack on.  Just grill your pizza dough until it’s cooked through, add your toppings, slice and serve.  The result was the perfect super fast, super easy way to make my favorite appetizer.

Prosciutto Flatbread

[ Printable Recipe ]

  • 1 pound pizza dough
  • 1/2 cup mascarpone cheese
  • 1/2 cup fig jam
  • 8 ounces prosciutto
  • 4 cups arugula

Divide your dough into two equal portions and roll into a ball, set on a lightly-floured surface and cover with a towel.  Bring to room temperature for about 1 hour prior to cooking.

Heat griddle or grill to high heat (or heat the oven to 500 degrees and put the rack on the lowest rung).  If you’re using the oven here, you’ll want to start pre-heating it at least 30 minutes early.

Shape your dough, I just stretched mine out into an oblong shape.  You can try for a circle or rectangle if it suits you, but don’t drive yourself crazy over it.  Sometimes I prick it with a fork to make it slightly less bubbly, but I’m not convinced that it makes a huge difference.

Grill your bread until poofed and browned on one side, then flip and cook the other side.  If you’re using the oven, it’s pretty much the same concept, you can leave it in there un-flipped just keep cooking until both sides are browned and the dough is cooked through.  You’ll have to do this twice, because there are two pieces of dough.  If you’re using the grill it only takes a few minutes per side, super easy!

Let it cool slightly, then when you can handle it comfortably, spread a layer of mascarpone on the flatbread (I find this is easier for some reason to do with the back of a spoon, maybe because the flatbread isn’t totally flat).  Then spread a layer of fig jam over the layer of mascarpone.  They’re going to mix together, it’ll be okay.  You’re halfway there.

Now you have two options, prosciutto and then arugula, or arugula and then prosciutto.  I prefer the latter, I find that putting the prosciutto on top helps to hold the arugula onto the flatbread.  If I put the arugula on top I end up chasing it around as it falls off of every bite I take.

Then, that’s it!  You’re done!  Slice it up and eat it.

warm-up wednesday: chili

photo(9)

Oh hello there.

I just made like a thousand cookies, and needed something that would kick all of the sweetness out of my system.  So I thought, why not a little bit of spice?

Plus, I hear it’s getting chilly for a lot of the country.  Not here, but the rest of you, I hear you’re getting chilly.  Here it is always acceptable to eat anything containing chilis, because it’s the southwest, and hey… this is chili country.  Or chile country.  (Not to be confused with the country of Chile)

There are two types of chili: Chili with beans, and then delicious chili.  This is delicious chili (no beans!).  I hate beans… I HATE THEM SO MUCH!

If you don’t have a fiery hatred of beans, by all means throw them in the pot, but you won’t find any beans in my chili.

dec-2-2

NO BEANS!!!

On a scale of one to “OMG MY MOUTH IS ON FIRE!” I would rank this at mild to medium heat.  It’s got a little kick, but not too much.  If you’re sensitive to heat (like my sister, she would probably say that her mouth was on fire if she ate this) you can leave out the chili flakes.  Or, do like I do, and eat it with some tasty cornbread or tortilla chips to help temper the heat.

I also find that making chili the day before I actually want to eat it, and then letting the flavors mingle in the fridge overnight helps the mellow the heat and improve the flavor.  Maybe that’s just in my head though, I’m not sure.

You can also see I like my chili a bit more on the “heartier” side, you can absolutely make yours “soupier” by adding more beef stock, or tomato juice, or even plain old water.  Whatever floats your boat!

Chili – Makes about 4 – 5 servings (but can easily be doubled)

[ Printable Recipe ]

  • 2 tablespoons vegetable oil
  • 1 large onion
  • 1 medium bell pepper, red
  • 1 lb ground beef
  • 1 tablespoon garlic, minced (2 – 3 cloves)
  • 2 tablespoons chili powder (sub some chipotle powder for extra flavor)* Salt-free
  • 1 tablespoon paprika (I used ½ smoked and ½ sweet)
  • ½ tablespoon dried oregano
  • ½ tablespoon garlic powder
  • ½ tablespoon ground cumin
  • ½ tablespoon chili flakes (optional)
  • 1 15-oz can tomato sauce
  • ½ cup beef broth (more if you like it soupier)
  • 1 teaspoon Worcestershire sauce
  • 1 ½ tablespoons cider vinegar
  • 1 teaspoon brown sugar
  • 1 15-oz can diced tomatoes, drained (or undrained, if you want it soupier)
  • 1 teaspoon salt
  1. Heat one tablespoon of oil in a dutch oven or large pan over medium heat. Add onion and cook until lightly browned, about 10 minutes. Add bell peppers and season with salt & pepper; continue to cook until caramelized (or as close to caramelized as you are patient for). Just keep going, you can do it!
  2. Once onions and peppers are cooked, remove and set aside. Add another tablespoon of oil to the pan and then the beef. Cook until browned (you may need to do this in batches if you are making a large pot of chili).  Add salt and pepper to beef, then add onions and peppers back to pan. Stir until well-mixed, then add garlic. Cook until fragrant, about one minute more.
  3. Add spices to the beef mixture. Cook one minute more, stirring constantly.
  4. Add tomato sauce, beef broth, worcestershire, brown sugar, and vinegar, stir to combine.
  5. Bring to a boil and add canned tomatoes; turn heat to low and continue to cook, covered, over low heat 45 minutes. After 45 minutes, stir, taste and adjust seasonings as needed. Continue to cook another 15 minutes, covered. Taste and adjust seasonings as necessary at the end.

Note:

When scaling up this recipe, I noticed that it wasn’t just a straight doubling or tripling of the recipe.  The amount for 3 pounds of beef was as follows:

Large Pot Chili Recipe

  • 3 lbs beef
  • 1 large or 2 medium white onions; finely chopped (about 2 cups)
  • 2 to 3 bell peppers; finely chopped (about 2 cups)
  • 2 Tablespoons minced garlic
  • 5 Tablespoons chili powder* (*Salt-free)
  • 1 Tablespoon smoked paprika
  • 1 Tablespoon sweet paprika
  • 1 Tablespoon ground cumin 
  • 1 Tablespoon garlic powder
  • 1/2 Tablespoon dried oregano
  • 1/2 Tablespoon chili flakes or 1 teaspoon cayenne, if desired, for heat* ( usually leave cayenne on the side so each person can meter their own spiciness)
  • 1 14.5-ounce can diced tomatoes; drained
  • 1 15-ounce can tomato sauce
  • 1 cup beef stock (or more if you like soupier)
  • 1 1/2 teaspoons Worcestershire sauce
  • 2 Tablespoons apple cider vinegar
  • 2 teaspoons + 1 teaspoon brown sugar, divided 
  • Oil, Salt, and Pepper as needed

Cook according to directions for small pot of chili.  Taste seasonings towards the end and adjust as necessary.  Add additional brown sugar at the end if it tastes too acidic, or additional vinegar if it tastes a bit dull.


chicken cheesesteaks

Ok, let’s take a brief recess here from the sugar and the sweets and all of those desserts that I love so much.    Just the thought of pie is making me a little… uncomfortable.  Let’s flip the “savory” switch.

And let’s lighten it up a bit… I need something with some substance to it.

Steak? No, something light… chicken maybe… but not too light… let’s put it on some bread.

There we go…  swap out fatty rib-eye steak for lean, healthy boneless-skinless chicken breasta healthy(er) alternative to your sinful cheesesteak sandwich, .

Or, at this time of year, it may even be a resourceful way to use up the last of that dreaded leftover Thanksgiving turkey… ugh… turkey… let’s not use that word again for… at least a week or two.

Even though I have several cheese sauce recipes lurking in my “to do” lists, I can never actually bring myself to make them, especially not with the amount of food I’ve devoured in the past week… so I opted for sliced provolone cheese instead.

I’m not trying to claim that these are “authentic”, in fact I wouldn’t even call them “cheesesteak” if I had a better name for them…

Philly Chicken-Cheesesteaks?

Philly cheese-chickens?  Nah…

Phoenix Chicken-Steaks?

Ooh, I like that, maybe add some hatch chiles and monterey jack cheese… oh man.  Just thinking out loud here.  I’ve definitely smeared some leftover chipotle aioli on these babies and it was pretty amazing…

Chicken “Cheesesteaks”

[ Printable Recipe ]

  • 1 lb thin-sliced boneless skinless chicken breast
  • 1 green bell pepper, seeded and sliced
  • 1 sweet onion, sliced
  • 6 slices provolone (or cheese of your choice)
  • 6 french rolls, halved lengthwise
  • salt and pepper, to taste

1. Preheat oven to 400 degrees, or heat your broiler (high or low, whatever you prefer).  Meanwhile, heat a sauté pan over medium/medium-high heat.

2. Generously salt and pepper both sides of the chicken breasts.  A shake or two of garlic powder never hurt anyone either, just sayin.  Cook with a teaspoon or two of olive oil over medium high until cooked through, set aside.

3. Add another teaspoon of oil to the pan, and sauté peppers and onions until just tender-crisp. Salt and pepper onions and peppers to taste. Set aside.

4. Line a baking pan with foil.  Slice chicken breast into thin strips, toss with peppers and onions, and put into six “piles” on the baking sheet.  Place one slice of cheese on top of each pile, and broil until cheese is melted and bubbly.  (If you have an oven-safe pan, and the ability to remember NOT TO GRAB A SUPER HOT HANDLE, you could just use your pan… but some of us aren’t that skilled).

5. Once cheese is melted, carefully remove pan from oven, and mix the chicken, peppers, onions, and cheese and pile each onto a French roll.  You can eat as is, or tightly wrap the whole sandwich in foil (with another piece of cheese, if you’re feeling naughty) and return to the oven for a few minutes to heat the bread through.

5 chile turkey burgers

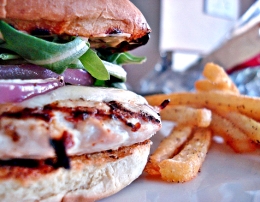
dsc_7261small

Despite the hard time I have finding good produce in the desert, during this time of year I can always count on the famous Hatch green chiles. I think, technically, their season is about up, but for the last couple weeks they’ve been flooding our grocery stores. At 50 cents a piece, I don’t have the willpower to resist!

When I get my hands on these things, I just can’t wait to roast them. Like roasting any pepper it leaves you with a soft, slightly sweeter version of what it once was. No matter what pepper it is, or how much you love the pepper raw, the roasted version puts the original to shame. A roasted hatch chile brings a smoky sweetness that perfectly complements the slightly tangy and spicy green chile pepper.

Ok, so you’ve roasted it, now what can you do with it? Just about anything, really. Throw it in some tacos, or a quesadilla, if you want to stick with the “mexican” theme. You can mix it into your scrambled eggs for a little heat or spice up a nice chip dip. Today, though, we put them on our burger. Because we can. (I know you’re shocked)… And because we’ve been a little bad lately, let’s use turkey burgers instead of beef.

Although, if you follow me on Instagram, you probably already know these are equally as taste with beef. And infinitely more adorable as sliders. Just sayin…

So, while I call these 5 chile burgers, you’re not required to use all five. Let’s count them, shall we? Hatch, Chipotle, Pepperjack (I think there’s some jalapenos in there?), then the optional asian spice from the sriracha and/or chili-garlic paste. So maybe “5 chile” is a bit of a stretch, but it’s a nice stretch that I’m willing to make, maybe I should call them “3 to 5 chile burgers”?

Oh, and don’t hate on the “chile” vs “chili” use, I use them interchangeably. I know it’s a subject of debate for some of you.

5 Chile Turkey Burgers

[ Printable Recipe ]

  • 2 hatch chiles, roasted and diced
  • 1 lb ground turkey (or 1.25 lbs if that’s what size yours comes in, why do they do that, anyway?)
  • Salt & Pepper
  • Pepperjack Cheese
  • Toppings of your choice (tomato, onion, lettuce)
  • Buns of your choice

Chipotle Aioli

  • ½ c mayo
  • 1 – 2 chipotles in adobo, finely minced (depending on how spicy you want it)
  • 2 cloves garlic, minced
  • 2 Tbs olive oil, plus extra for misting
  • 1 tsp lemon (or lime) juice
  • Salt & Pepper
  1. Roast the chiles: Rub with oil and cook over a grill or under your broiler until black and bubbling on all sides. Remove from heat and place in a bowl covered with plastic wrap or in a plastic bag to steam. Once cooled, peel off the skin and finely dice. Can be made one day ahead. *See notes!
  2. Make the aioli: Mix all aioli ingredients together in a blender or small container. Cover and refrigerate until ready to use. Can be made one day ahead
  3. Make the patties: Gently mix ground turkey, some salt and pepper, a tablespoon or two of the aioli, and one of your diced hatch chiles together in a bowl. What’s that? You’re feeling spicy? A dash of sriracha or chili-garlic paste will help you to kick up the heat. These may also be made one day in advance, cover tightly and refrigerate until you’re ready to cook them. They will be very delicate (and probably pretty sticky). I also like to sprinkle them with salt and pepper on the outside of the patties as well, a drizzle of oil will help to prevent them from sticking to the grill. I make 5 ¼ lb patties.
  4. Cook patties until done, at the end of cooking top with green chiles and cheese and cover until melted.
  5. Toast buns: While not necessary, this will enhance your burger experience greatly. Rub some of the aioli on your buns and grill or broil until toasted. Top with burger and toppings as desired.

Notes: 

*For some reason I always forget that I actually want to dice my chile, I know it seems weird, but just do it that way. Patty/Dice chile/ Then cheese (to hold it all together).

*Use your leftover chipotle aioli to dip your french fries in … trust me. And opt for the Ore-Ida Fast Fries, boyfriend got me hooked on those things.

*On extra lazy days, I’ve been known to use ONLY the chipotles and the mayo, and BF has never once complained.

* If you’re worried about your mouth being on fire, go ahead and use Monterey Jack or Cheddar cheese. 

*Use your leftover chipotle aioli to dip your french fries in … trust me. And opt for the Ore-Ida Fast Fries, boyfriend got me hooked on those things.

five chile burger pin


You may also like:


scarpetta’s stromboli

scarpetta stromboli
As you know, I’M ON VACATION! Well, technically I’m on my way BACK from vacation now… You’ll all know soon enough about what I have been eating while I was on vacation, but many of you may be wondering what the BF eats while I’m on vacation. What does the BF eat when I’m not home to cook for him? Well, honestly, probably a lot of fast food. But I do leave him some home-cooked goodness in the freezer to eat just in case he is motivated enough to heat it up.

For this trip, one of the items I left behind for him was a loaf of tasty homemade stromboli from the Scarpetta’s stromboli recipe.We ate this stromboli for dinner, but Scarpetta’s serves it as part of their bread basket.

Stromboli (essentially a rolled up pizza) is fresh bread filled with meat and cheese and served with a dipping sauce. My favorite types of stromboli growing up came from my momma’s oven, filled with ham and cheese or meatballs and sauce… so don’t feel like you have to be stuck with the fillings in the recipe.

Whether you want an appetizer to feed a crowd or a simple dinner, this recipe is perfect for you. Plus, it’s a great candidate for freezing. You can just slice the stromboli and freeze it, wrapped in foil, then in a plastic bag. To reheat, warm the foil-wrapped stromboli in the oven for about 20 – 30 minutes at 375 degrees. The time it takes to warm may vary depending on how much you are warming at once and the thickness of your slices.

Scarpetta’s Stromboli Recipe

[ Printable Recipe ]

Dough:

  • 1 tablespoon dry yeast
  • Extra-virgin olive oil
  • 5 1/2 cups bread flour
  • 2 teaspoons salt

Filling:

  • 2 cups grated smoked mozzarella
  • Salt
  • 1/2 bunch fresh basil, leaves chopped
  • 1 tablespoon chopped garlic
  • Freshly ground black pepper
  • 4 ounces salami, sliced thin
  • Extra-virgin olive oil

Toppings:

  • 1 tablespoon fresh rosemary leaves, chopped
  • 1 teaspoon sea salt, such as Maldon
  • 1/4 pint cherry tomatoes, halved

For the dough: Whisk together 2 cups cold water, the yeast and 1 1/2 tablespoons oil.  Put in a stand mixer with the dough hook attachment. Mix on low speed for 5 minutes.  Add the flour and continue mixing for an additional 5 minutes. Then mix on medium speed for an additional 5 minutes. Add the salt until incorporated. Add 1 tablespoon oil at the end of the 5 minutes.

Transfer the mixture to a a large bowl and drizzle about 2 tablespoons oil on top. Wrap all the way around with plastic wrap and put in a warm spot to rise for about 1 1/2 hours until doubled in size.

Preheat the oven to 375 degrees F when you are getting ready to fill the strombolis.

To make the stromboli: When ready, transfer the dough to an oiled table or flat surface and form into a log; cut into two equal pieces. Cover with plastic so it doesn’t dry out. Let rest for another 5 to 10 minutes.

Lightly brush a baking tray with oil or cover with parchment.  Spread out the dough on the oiled countertop with the palms of your hands, don’t use your fingertips. It should be even all the way around, with no fat edges.

Place half the fillings on one piece of dough in the order listed: mozzarella, salt, basil, garlic, pepper and salami, leaving a 2-inch border along the bottom. Roll the dough over twice, seal the sides with your palm, fold over the bottom and then the sides. Transfer to the tray and rub a little oil on top. Repeat with the second portion of dough. Put the rosemary, sea salt and tomatoes on top. Cover the tray with plastic and let sit for 15 minutes to rest.

When ready to bake, put a pan of ice in the oven for 5 minutes. REMOVE THE PAN and place the Stromboli tray in the oven and bake for a total of 45 minutes. After 20 minutes, turn 180 degrees. Bake another 20 minutes, then turn again and bake the remaining 5 minutes. (If it looks like it’s browning evenly, you can probably skip all the turning, I just turned it once towards the end).

Transfer to a new baking sheet lined with parchment. Allow the loaves to cool. Slice and serve with desired dipping sauce.

[ Recipe adapted from Scarpetta’s Restaurant c/o Food Network ]