green juice

green juice 1

After a weekend spent at the brim of uncomfortable fullness, the last thing I can think about today is the last piece of birthday cake sitting in the refrigerator.  Actually, it’s one of the only things I can think about, but I can’t imagine eating it.  Not even one bite.

The last thing I need in my life right now is another piece of cake.

My body is craving one thing: green.

I know, you totally think I’m crazy, but I promise you I’m not.  Not completely, at least.

green juice 2

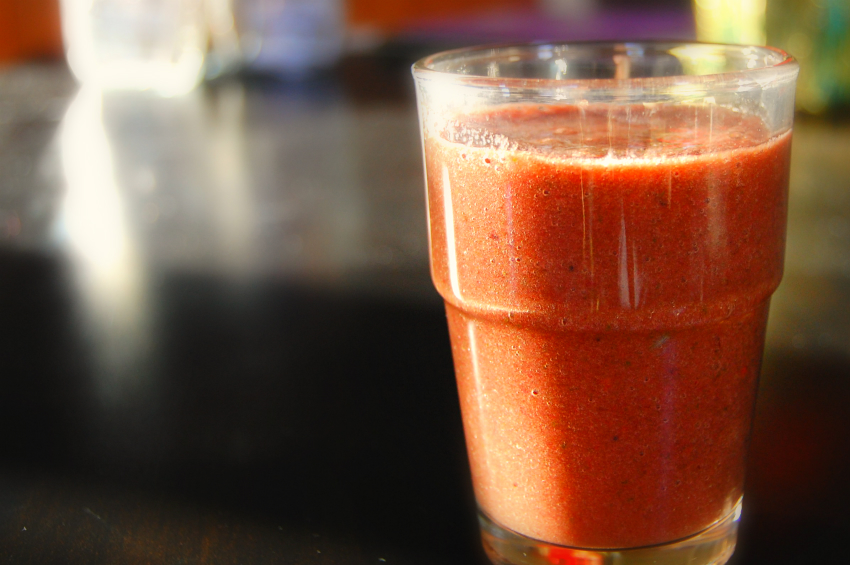
So, before you turn your nose up at the thought of a green juice, listen to this.  This is not bitter, or sour, or savory, nor does it taste like “green” (think: wheatgrass. yuck!)

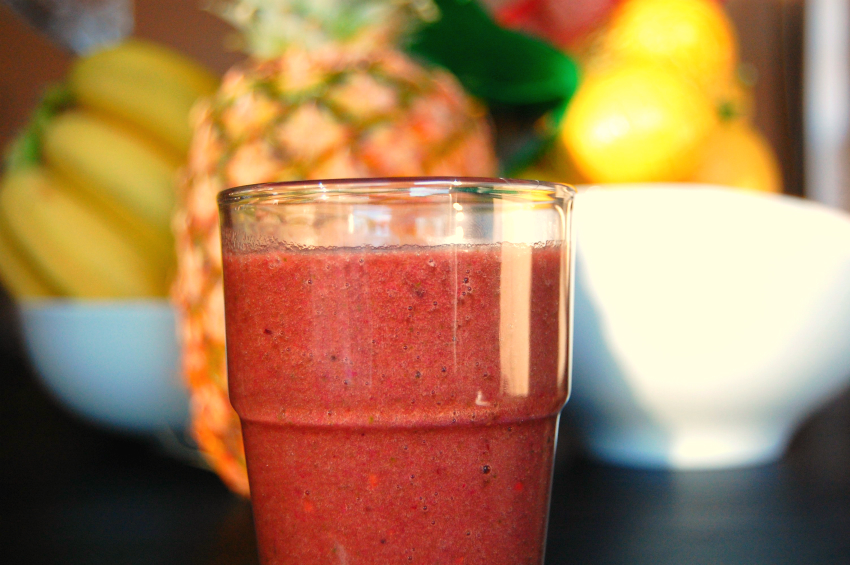
This juice does not taste like green.  There is a tiny bit of pineapple in there, and that’s the magical ingredient with juice.  Whatever you are putting in your juice, I promise that if you put just like a cup of pineapple in there it will magically taste like fruity deliciousness.

True story.

I’m not an organic food snob, but when it comes to juicing I use organic whenever possible.  I don’t chop my fruit or veggies (unless they don’t fit into the opening in my juicer).  If you don’t have a juicer, I have also included directions for making the juice in your blender.

This isn’t baking, so you don’t need to be exact, and while I don’t think I’ve made this “recipe” the same way twice (for example, I’m out of spinach so yesterday I used only kale), it’s kinda a franken-juice from all of the green juice recipes I’ve perused online…  it goes a little something like this…

Green Juice

Makes about 16 ounces* of juice

*Your actual yield will vary depending on how juicy your produce is

Printable Recipe

  • 1 to 2 handfuls baby spinach (about 2 cups loosely packed)
  • 1 to 2 handfuls chopped tuscan kale ( 2 – 3 kale leaves, stems removed)
  • 2 stalks celery (Sometimes I leave the celery out if it smells salty.  That’s totally a thing.  Remember that thing I said about how I’m not crazy?)
  • 1/2 english cucumber
  • 3 medium (3-inch) green apples
  • 1/2 to 1 cup pineapple (about 1/4 to 1/3 of a pineapple, cored with skin removed)
  • 1 Tablespoon lemon juice


Since I’m not peeling them, I start with fresh, organic produce, wash it thoroughly, and cut it just so it’s small enough to fit into the mouth of my juicer.

Add ingredients to juicer in order listed.  Done! (That was easy right?)

If you’re using a blender instead of a juicer, go ahead and chop everything into roughly equal-sized pieces.  Add about a half of water to the ingredients (just enough to get everything moving around in there, add more if needed)  in your blender and whirring away until completely blended.  From there you can drink it as a smoothie, or strain out the solids and enjoy it as a juice.

 *A lot of green juice recipes tell you to use parsley, it has magical cleansing and anti-inflammatory properties.  I, however, despise the taste of parsley with the strength of 1,000 suns.  Don’t ask why, I just do.  And even though I’m sure a couple of sprigs wouldn’t kill me, for the sake of flavor (re: delicious vs herby), I left it out.  Feel free to add some if you like, it’s up to you. 

fruit smoothie with a secret

DSC_8084sm

I’m no beacon of health or anything, but it is a new year, and I know some of you may have health-related resolutions, or still have a bit of a sugar hangover from the holidays, and maybe you don’t want to stare at pictures of pie all day.  I understand that.  I get it.  I’m sensitive to your needs (for today, at least).  Besides, I’ve got resolutions too, ya know.

Well, probably more “goals” than “resolutions”.  I’ve never really been known for my strong will.

My main goal is pretty simple: eat more fruits and veggies.  I noticed that the majority of my vegetable-eating occurs at dinner, and is mostly just whatever side vegetable I have selected for our meal, or perhaps some sad, hastily assembled salad.  As for my fruit consumption, that can be described as abysmal at best.

That means not only more veggies at the dinner table, but packing (and remembering to grab) healthy snacks for work, and maybe even sneaking in a vegetarian meal or two (if I can find a way to do that without the BF noticing)… but the easiest way I could think of to get more fruits and veggies into my diet?  Putting a whole bunch into a blender and pulverizing them into oblivion.  Plus, I got this shiny new blender for Christmas and this seemed like the perfect excuse to use it.  At least until margarita season arrives (yes, there is such thing as a margarita season).

DSC_8079sm

The verdict?  Success!  Great success, even!

Not only did my blender perform beautifully, but I had a breakfast consisting of purely fruits and vegetables!  AND IT WAS FILLING!  I could drink these things all day long.  This particular smoothie tastes like your typical berry smoothie, but it has a secret ingredient:  Spinach!  It might sound weird putting spinach in a fruit smoothie, but you don’t even taste it.  Honest, I swear you wouldn’t even know the spinach was in there if you didn’t put it in there with your own two hands!

Oh, and remember guys and gals, this is a smoothie, not a chemistry experiment, so approximation and experimentation are OK here.  Use any fruit or leafy green you like!

Sneaky Fruit & Veggie Smoothie

[ Printable Recipe ]

  • 1 cup water or fruit juice (apple or orange juice might be a good touch)
  • 1 cup pineapple, cut into even chunks
  • 2 handfuls baby spinach, about 2 cups loosely packed
  • 1/2 cup sliced banana (about 1/2 medium banana or 1 small banana)
  • 1/2 cup fresh berries (I used some blackberries and blueberries that I had in the freezer)
  • Bonus: 1 oz B12 liquid for an energy boost (since drinking this AND my morning coffee would be too much)

Put water or juice in the blender, and pile everything else on top of it.  Blend at low-speed (1 on my blender) for one minute, then at medium speed (3 on my blender) for another minute. 

Makes about two 10-oz servings

*Note – the smoothie had darkened significantly by day two, so I couldn’t bring myself to drink the rest of it.  I think I will try adding a tablespoon or two of lemon juice to it next time to see if that helps to keep the smoothie nice and bright.

chicken cheesesteaks

Ok, let’s take a brief recess here from the sugar and the sweets and all of those desserts that I love so much.    Just the thought of pie is making me a little… uncomfortable.  Let’s flip the “savory” switch.

And let’s lighten it up a bit… I need something with some substance to it.

Steak? No, something light… chicken maybe… but not too light… let’s put it on some bread.

There we go…  swap out fatty rib-eye steak for lean, healthy boneless-skinless chicken breasta healthy(er) alternative to your sinful cheesesteak sandwich, .

Or, at this time of year, it may even be a resourceful way to use up the last of that dreaded leftover Thanksgiving turkey… ugh… turkey… let’s not use that word again for… at least a week or two.

Even though I have several cheese sauce recipes lurking in my “to do” lists, I can never actually bring myself to make them, especially not with the amount of food I’ve devoured in the past week… so I opted for sliced provolone cheese instead.

I’m not trying to claim that these are “authentic”, in fact I wouldn’t even call them “cheesesteak” if I had a better name for them…

Philly Chicken-Cheesesteaks?

Philly cheese-chickens?  Nah…

Phoenix Chicken-Steaks?

Ooh, I like that, maybe add some hatch chiles and monterey jack cheese… oh man.  Just thinking out loud here.  I’ve definitely smeared some leftover chipotle aioli on these babies and it was pretty amazing…

Chicken “Cheesesteaks”

[ Printable Recipe ]

  • 1 lb thin-sliced boneless skinless chicken breast
  • 1 green bell pepper, seeded and sliced
  • 1 sweet onion, sliced
  • 6 slices provolone (or cheese of your choice)
  • 6 french rolls, halved lengthwise
  • salt and pepper, to taste

1. Preheat oven to 400 degrees, or heat your broiler (high or low, whatever you prefer).  Meanwhile, heat a sauté pan over medium/medium-high heat.

2. Generously salt and pepper both sides of the chicken breasts.  A shake or two of garlic powder never hurt anyone either, just sayin.  Cook with a teaspoon or two of olive oil over medium high until cooked through, set aside.

3. Add another teaspoon of oil to the pan, and sauté peppers and onions until just tender-crisp. Salt and pepper onions and peppers to taste. Set aside.

4. Line a baking pan with foil.  Slice chicken breast into thin strips, toss with peppers and onions, and put into six “piles” on the baking sheet.  Place one slice of cheese on top of each pile, and broil until cheese is melted and bubbly.  (If you have an oven-safe pan, and the ability to remember NOT TO GRAB A SUPER HOT HANDLE, you could just use your pan… but some of us aren’t that skilled).

5. Once cheese is melted, carefully remove pan from oven, and mix the chicken, peppers, onions, and cheese and pile each onto a French roll.  You can eat as is, or tightly wrap the whole sandwich in foil (with another piece of cheese, if you’re feeling naughty) and return to the oven for a few minutes to heat the bread through.

spider cupcakes

I actually succeeded in my attempt to make something Halloween-y before Halloween… twice!  Exciting, right?

These spider cupcakes adorably creepy (if that’s a thing?) but one thing that’s NOT scary?  Their nutrition stats!  That’s right, cupcakes that aren’t terrible for you!  Believe me, I know that right about now we are all looking for a reduced-guilt way to enjoy our sweets (before we go overboard on Wednesday).

So now you can make these adorably terrifying not terrible for you spiders for your Halloween party, whether it’s at home, work, or school!

I used a lightened-up recipe from skinnytaste that replaces all the oil and eggs with pumpkin, which means, according to me, these cupcakes are actually GOOD for you (since pumpkin is good for you).  According to skinntaste these cuddly little guys come in at about 140 calories a piece (I think that is excluding the extra candy).  You can use any cupcake recipe or boxed mix you like.

You could use a whole can of pumpkin (instead of a mix of pumpkin and water), which I hear makes the cupcakes super rich and ooey-gooey.  I’m no scientist but I was pretty sure a whole can of pumpkin had more calories than half of it, so I opted for this “healthy” recipe and plan to save the other version for a time when I have extra canned pumpkin to spare.

The verdict?  These were pretty darn good, but I could definitely tell they weren’t “regular” cupcakes.  The tops ended up a bit crackly, and I could slightly taste the pumpkin, but I think if I had used a richer, more chocolatey mix it would’ve masked the flavor better.  With all the binging I’m going to be doing on Halloween candy and potluck food (not to mention the holidays coming up), I’m in desperate need of something a little… lighter.

Side note: since everyone in the world hates black licorice, I was able to find this Wilton licorice made just for decorating.  It looks like black licorice but tastes like red! Win!

I like him.  And how he his shaking his tiny spider fist in a menacing fashion.  BF would definitely scream for me to come squash this little guy.

Adorably Terrifying Spider Cupcakes

Ingredients

    For cupcakes:
  • 16.5 oz Duncan Hines Cake mix (I used Devil’s Food)
  • 3/4 cup + 2 tbsp canned pumpkin (NOT pumpkin pie filling)
  • 3/4 cup + 2 tbsp water
  • For glaze
  • 3 oz chocolate, chopped
  • ¼ cup heavy cream
  • ½ tablespoon light corn syrup
  • For decorating
  • Eyeballs, chocolate sprinkles, and licorice legs

Instructions

  1. Preheat oven to 350F degrees. Line 18 muffin tins with cupcake liners.
  2. In a medium bowl, blend pumpkin and water together with an electric mixer. Add cake mix and beat until well-mixed. The batter will be very thick.
  3. Cool completely before decorating.
  4. Make the glaze:
  5. Heat chocolate and cream in a microwave-safe bowl for 45 seconds to 1 minute. Remove from microwave and stir until all the chocolate has melted. Add corn syrup and stir until the mixture is smooth and shiny.
  6. To decorate:
  7. Dip the cupcakes in the glaze and use a spreader if necessary to smooth the top. Sprinkle chocolate sprinkles over the cupcakes before the glaze sets and add the eyeballs.
  8. Using a toothpick or skewer, poke four holes on each side of the cupcake for the legs. Insert the licorice and voila – spiders!
https://wee-eats.com/2012/10/29/spider-cupcakes/

[ Cupcake recipe adapted from skinnytaste ]

5 chile turkey burgers

dsc_7261small

Despite the hard time I have finding good produce in the desert, during this time of year I can always count on the famous Hatch green chiles. I think, technically, their season is about up, but for the last couple weeks they’ve been flooding our grocery stores. At 50 cents a piece, I don’t have the willpower to resist!

When I get my hands on these things, I just can’t wait to roast them. Like roasting any pepper it leaves you with a soft, slightly sweeter version of what it once was. No matter what pepper it is, or how much you love the pepper raw, the roasted version puts the original to shame. A roasted hatch chile brings a smoky sweetness that perfectly complements the slightly tangy and spicy green chile pepper.

Ok, so you’ve roasted it, now what can you do with it? Just about anything, really. Throw it in some tacos, or a quesadilla, if you want to stick with the “mexican” theme. You can mix it into your scrambled eggs for a little heat or spice up a nice chip dip. Today, though, we put them on our burger. Because we can. (I know you’re shocked)… And because we’ve been a little bad lately, let’s use turkey burgers instead of beef.

Although, if you follow me on Instagram, you probably already know these are equally as taste with beef. And infinitely more adorable as sliders. Just sayin…

So, while I call these 5 chile burgers, you’re not required to use all five. Let’s count them, shall we? Hatch, Chipotle, Pepperjack (I think there’s some jalapenos in there?), then the optional asian spice from the sriracha and/or chili-garlic paste. So maybe “5 chile” is a bit of a stretch, but it’s a nice stretch that I’m willing to make, maybe I should call them “3 to 5 chile burgers”?

Oh, and don’t hate on the “chile” vs “chili” use, I use them interchangeably. I know it’s a subject of debate for some of you.

5 Chile Turkey Burgers

[ Printable Recipe ]

  • 2 hatch chiles, roasted and diced
  • 1 lb ground turkey (or 1.25 lbs if that’s what size yours comes in, why do they do that, anyway?)
  • Salt & Pepper
  • Pepperjack Cheese
  • Toppings of your choice (tomato, onion, lettuce)
  • Buns of your choice

Chipotle Aioli

  • ½ c mayo
  • 1 – 2 chipotles in adobo, finely minced (depending on how spicy you want it)
  • 2 cloves garlic, minced
  • 2 Tbs olive oil, plus extra for misting
  • 1 tsp lemon (or lime) juice
  • Salt & Pepper
  1. Roast the chiles: Rub with oil and cook over a grill or under your broiler until black and bubbling on all sides. Remove from heat and place in a bowl covered with plastic wrap or in a plastic bag to steam. Once cooled, peel off the skin and finely dice. Can be made one day ahead. *See notes!
  2. Make the aioli: Mix all aioli ingredients together in a blender or small container. Cover and refrigerate until ready to use. Can be made one day ahead
  3. Make the patties: Gently mix ground turkey, some salt and pepper, a tablespoon or two of the aioli, and one of your diced hatch chiles together in a bowl. What’s that? You’re feeling spicy? A dash of sriracha or chili-garlic paste will help you to kick up the heat. These may also be made one day in advance, cover tightly and refrigerate until you’re ready to cook them. They will be very delicate (and probably pretty sticky). I also like to sprinkle them with salt and pepper on the outside of the patties as well, a drizzle of oil will help to prevent them from sticking to the grill. I make 5 ¼ lb patties.
  4. Cook patties until done, at the end of cooking top with green chiles and cheese and cover until melted.
  5. Toast buns: While not necessary, this will enhance your burger experience greatly. Rub some of the aioli on your buns and grill or broil until toasted. Top with burger and toppings as desired.

Notes: 

*For some reason I always forget that I actually want to dice my chile, I know it seems weird, but just do it that way. Patty/Dice chile/ Then cheese (to hold it all together).

*Use your leftover chipotle aioli to dip your french fries in … trust me. And opt for the Ore-Ida Fast Fries, boyfriend got me hooked on those things.

*On extra lazy days, I’ve been known to use ONLY the chipotles and the mayo, and BF has never once complained.

* If you’re worried about your mouth being on fire, go ahead and use Monterey Jack or Cheddar cheese. 

*Use your leftover chipotle aioli to dip your french fries in … trust me. And opt for the Ore-Ida Fast Fries, boyfriend got me hooked on those things.

five chile burger pin


You may also like: