Search Results for: cookie madness
cookies & bars
dessert recipes
red velvet poke cake

As you know, in honor of my birthday month (and also, in honor of cake), I am celebrating Cake Month for the whole month of March! So instead of March Madness, or Cookie Madness, we have CAKE MADNESS!
It’s the best kind of madness… BECAUSE THERE’S CAKE!
And everyone loves cake.
Everyone.

Last week’s cake was brownie-swirl cake, and we even ended Februrary with making our own ding dongs. This week, I give to you poke cake. “What is a poke cake,” you ask?
Remember my Better than (ahem) “Anything” Cake? Well, that’s a poke cake. And so is this. Basically a poke cake is a cake that you poke holes in, and then cover in a sweet liquid (in this cake: sweetened condensed milk). You see, when you drizzle your cake with a sweetened liquid, something magical happens. The cake absorbs all the liquid and then becomes super-saturated with sweet sugary goodness making it extra moist and delicious.
Trust me. It’s a good thing.
If you’re afraid of (or prone to) baking a dry cake, then poke cakes should be your best friend.
And the frosting, oh my this frosting, it’s to die for. I think it’s going to be my new go-to for cream cheese frosting. Until now, I had a hard time getting the right balance of sweet and tang to my cream cheese frosting, but not anymore. This frosting is great and the recipe had enough left over to use for … whatever it is that you like to use your extra frosting for (like dipping pretzels into? Just an idea…).
The bigger the holes you poke, the more holes for your frosting to ooze into. This makes a pretty cake, while smaller holes will make a denser, richer cake. The choice is yours, but I promise that whatever choice you make, you will be very pleased with the results.
Red Velvet Poke Cake
Makes one 9-by-13-inch cake
For the Cake:
- 8 Tablespoons (1 stick) unsalted butter, softened
- 1½ cups granulated sugar
- 2 large eggs
- 5 Tablespoons unsweetened cocoa powder
- 6 tablespoons red food coloring* (see note)
- 1 teaspoon vanilla extract
- 1 cup buttermilk
- 2¼ cups all-purpose flour
- 1 teaspoon salt
- 1 teaspoon baking soda
- 1 Tablespoon distilled white vinegar
For the Soak:
- 1 (12-ounce) can sweetened condensed milk
- ½ teaspoon vanilla paste or extract
For the Frosting:
- 8 ounces butter, at room temperature
- 8 ounces cream cheese, at room temperature
- 4 cups powdered sugar
- 1 to 2 tablespoons vanilla extract, to taste
For the Cake:
Preheat oven to 350°F and prepare a 9×13-inch pan for baking.
1. In a small bowl (or I used a 1-cup measuring cup) mix together the cocoa powder, vanilla extract, and red food coloring.
*Note: I only had gel food coloring, so I used 1 teaspoon of red gel coloring and 3 Tablespoons of milk + 2 Tablespoons of water.
*If you are terrified of red food coloring, honestly it’s a little off-putting for me if I put too much thought into it, then you can leave the food coloring out and just use the 3 Tbs milk/2 Tbs water mix instead. Your cake won’t be red but it will still be velvety and delicious.
2. In a medium bowl, mix together the flour, baking soda, and salt; set aside.
3. In the bowl of a stand mixer fitted with a paddle attachment, cream butter and sugar on medium-high until light and fluffy. Scrape down the bowl and turn the mixer to low. Add the eggs, one at a time, until completely incorporated. Scrape down the bowl again.
4. Add the cocoa/food coloring mixture to the batter and mix on medium speed until combined, scraping the bowl as necessary. Continue mixing until the color is evenly distributed throughout the batter.
5. Reduce the speed to low and add the buttermilk and flour in two additions (½ buttermilk-½ flour-½ buttermilk-½ flour). Mix until each ingredient is incorporated, scraping down the bowl as necessary. Continue to mix until last bit of flour is incorporated and scrape the sides and bottom of the bowl to ensure all the flour is mixed in.
6. Add the vinegar and mix until completely combined, scraping the bowl (again) afterwards.
7. Pour the batter into the prepared baking pan, smoothing the top with a spatula. Bake 25 to 30 minutes until a toothpick entered into the center comes out with just a few crumbs clinging to it.
8. Remove the cake from the oven and immediately poke holes all over the top of the cake with the back of a wooden spoon (or I used a chopstick, a fork will also work just fine, doesn’t really matter how big the holes are).
9. Warm condensed milk for 1 minute in the microwave make sure you do this in a cup or bowl and NOT in the metal can that it comes in). Stir in ½ teaspoon of vanilla extract and pour the can of condensed milk all over the top of the cake; allow the cake to cool completely before frosting.
For the Frosting:
1. In a large bowl whip the butter and cream cheese on high speed for about 5 minutes (you can use a whisk or paddle attachment), scraping the bowl down as necessary.
2. Reduce the speed to low and slowly add the powdered sugar, 1 cup at a time, pulsing to mix after each addition. Mix on low until incorporated. Add the vanilla extract and and increase the speed to medium high and whip for a few minutes until the frosting is light and fluffy, scraping the bowl as necessary.
3. Spread the frosting evenly over the top of the cake. Store leftovers in an airtight container in the refrigerator for up to 1 week.
[ Recipe adapted from Brown Eyed Baker ]
s’more cookies, please
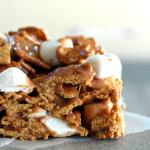
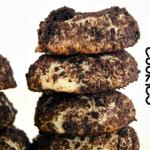
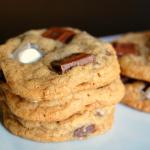
So I don’t think this is what the BF meant when he asked for “s’more cookies” BUT…
Yeah, sorry. I’m horrible. Can’t stop myself from making s’more jokes. I’m so sorry. Please don’t hold it against me. Or these cookies.
While these aren’t traditional “Christmas” cookies, for some reason when it’s all cold out, I want things like chocolate, and marshmallows, whether it’s in cocoa or s’more form. Problem is, not everyone has the option of making s’mores in the winter… I mean, I’m not too good to “roast” marshmallows over the stove (not that I have to in AZ, we can roast marshmallows all year long), but these are a delightful alternative.
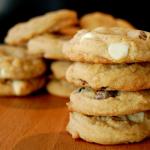
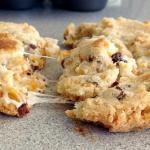
With graham crackers baked right into the cookie, and how cute are those little Hershey and marshmallow pieces sticking out? I swear I could die. I think these will be a new addition to my cookie boxes this year (hope none of you guys are reading this one…)
S’more Cookies
[ Printable Recipe ]
- 1 cup graham cracker crumbs (7-8 crackers)
- 1 ¼ cups all-purpose flour
- ½ teaspoon baking soda
- ½ teaspoon salt
- 1 ½ sticks (6 oz) unsalted butter
- ½ cup sugar
- ½ cup packed brown sugar
- 1 large egg
- 1 teaspoon vanilla extract
- 1 cup semi-sweet chocolate chips
- 1 cup mini marshmallows
- 2 Hershey bars, coarsely chopped
Preheat oven to 350 degrees F and line two baking sheets with parchment.
1. If necessary, crumble 8 graham crackers in a food processor. Measure 1 cup of crumbs and set aside.
2. Whisk graham crumbs, flour, baking soda, and salt together in a medium bowl. Set aside.
3. Cream the butter and sugars on medium until light and fluffy. Beat in egg and vanilla. Add flour mixture and mix on low until just combined. Stir in chocolate chips.
4. Drop tablespoons of dough onto baking sheets, spacing about 2 inches apart. Bake for about 10 minutes, until set. Remove from oven and quickly push a few marshmallows and pieces of Hershey bar into the top of each cookie.
5. Return cookies to the oven to finish baking, about 2 t0 3 more minutes. Cool cookies on baking sheets for 5 minutes before transferring to a wire rack to cool completely.
[ adapted from cookie madness ]
You may also like…
























![happy birthday to me [ and the momofuku confetti cake ] happy birthday to me [ and the momofuku confetti cake ]](http://wee-eats.com/wp-content/plugins/category-grid-view-gallery/includes/timthumb.php?src=https%3A%2F%2Fwee-eats.com%2Fwp-content%2Fuploads%2F2013%2F03%2Fconfetti-cake-crop-8477-1024x680.jpg&h=150&w=150&zc=1&q=75)
