cookie madness: nyo sugar cookies

DSC_7681

On my quest to find the perfect cookie for the Great Food Blogger Cookie Swap, I read a lot of recipes.  A lot.

So many recipes that I had to ban myself from reading anymore recipes.  And then I read more.  And banned myself again.  And again.

And then I was grabbing something from the pantry and noticed this recipe hanging inconspicuously from a bottle of vegetable oil.  I didn’t mean to read the recipe, it just happened.  All on its own.  Out of my control.

Next thing I knew all of the ingredients were on the counter and then… by then I was too far in.  There was no turning back.

These are like sugar cookies, but so much better.  So, so much better.  The secret?  Brown sugar.

Brown sugar cookies.  So simple.  So sweet.  So delicious.

Even Boyfriend who thinks that sugar cookies are “a waste of a cookie” loved these.  Amazing what a difference brown sugar makes.  Just look at how soft and chewy they are.

DSC_7692

You’re drooling, I know.

It’s ok.  I won’t tell.  Just go into the kitchen and make these cookies.  Like, now.

Brown Sugar Cookies

[ Printable Recipe ]

  • 1/2 cup vegetable shortening
  • 1/2 cup butter
  • 1 1/4 cups firmly packed brown sugar
  • 1 large egg
  • 1 teaspoon vanilla extract
  • 2 cups all purpose flour
  • 1/2 teaspoon baking soda
  • 1/4 teaspoon salt


  1. Heat oven to 350ºF


  1. In a medium bowl, mix flour, baking soda, and salt.  In a large mixing bowl, beat shortening and butter until creamy.  Add brown sugar, egg and  vanilla, continue to beat until light and fluffy.  Mix in flour, baking soda and salt.


  1. Shape dough into 1-inch balls and place 2 inches apart onto cookie sheet.  (I chilled my dough and then flattened it slightly before baking).


  1. Bake 12 to 14 minutes or until golden brown (I kept mine closer to 12).  Cool on baking sheet on a wire rack 10 minutes, then transfer to cooling rack to finish cooling completely.


[ Adapted from the tag hanging on my bottle of Crisco ]

red velvet cookies

DSC_7660

Today’s cookies are easy cookies.

Because it’s Sunday.

And because I’m baking cookie swap cookies today.

But I can’t post those yet.

And because BF couldn’t shut up about how good these were.

So today’s cookies had to be easy enough that I could make them and not interfere with my other baking.  But still good enough that BF couldn’t keep himself out of the kitchen.

DSC_7640

Inspired by Shannon’s beautiful 1-2-3 cookies.  She was embarrassed by how easy these were, but really, when you’re making a bajillion cookies for people, sometimes you need one really easy cookie.

I know I do, at least.

To make these more festive, you could color your topping green, or put Christmas-themed sprinkles on them.  Or you could make cute little Christmas Cookie Pops (similar to Shannon’s “caramel apples”… but maybe call them “ornaments’ or “holly berries” or something Christmas-y instead).

Oh, and did I mention that we made a cream-cheese-stuffed version?  I didn’t have the patience to freeze my cream cheese so it ended up kinda weaving itself through the cookie, which was actually rather delightful.

DSC_7647

Red Velvet Cookies

[ Printable Recipe ]

  • 1 box red velvet cake mix
  • 2 large eggs
  • 1/3 cup + 1 Tablespoon vegetable oil
  • 1 teaspoon pure vanilla extract
  • Vanilla candy coating (optional)

If you want to add cream cheese filling

  • 4 ounces cream cheese
  • 1 tablespoon butter, softened
  • 1 3/4 cups powdered sugar
  • 1 teaspoon pure vanilla extract
  • tiny pinch salt (super tiny, MAYBE 1/8 teaspoon)

1.  In a large bowl mix cake mix, eggs, and vegetable oil with an electric mixer until smooth.  (It gave my mixer quite a workout).  Oh, and wear your apron unless you always wanted that shirt to have pink polka-dots anyway.

2.  Dump into dough-mound onto plastic wrap.  Wrap and chill 2 hours.

Once chilled, scoop into 1-inch balls and place on parchment-lined baking sheet.*

*Alternatively, you could scoop immediately and then cover with plastic wrap and chill 30 minutes to an hour. 

3.  When ready to bake, preheat oven to 350F degrees for 8 – 10 minutes until baked through.   Let cool on baking sheet.

4.  Drizzle with melted candy coating in a haphazard manner.  Add decorative sprinkles before the coating dries, if desired.

If you want to add the cream cheese… 

1.  Whip cream cheese, vanilla, salt, and powdered sugar until blended.  Cover and freeze until firm, about two hours.

Once frozen, scoop into 1/2 teaspoon-sized balls.

When ready to form your cookies…

1.  Working in batches (so some can stay chilled in the fridge), flatten one of your cookie-dough balls until it is about 2-inches in diameter.

2.  Place cream cheese ball in the middle and pinch dough closed around it.  Roll until smooth and return to refrigerator for 15 minutes.

3.  Bake at 350F degrees for 11 – 13 minutes until done.

You may also like these Pumpkin Dessert Squares which cheat with yellow cake mix 🙂

pumpkin dessert (or breakfast) squares

no bake cookies

no bake oatmeal cookies

//Flashback attack….

Once upon a time ago, neighbors talked to each other. They helped each other out with yardwork or simple home repairs, they watched each others’ kids, and would invite each other over for dinner. New families would be welcomed to the neighborhood with a plate of cookies, and if you ran out of sugar you could simply run next door for a whole cup of it…

Does anyone remember these days? Did they really exist? Yes, well back then… or as they say, “BACK IN MY DAY” (because apparently I’m 100) there were these things called “block parties.”

Block parties were huge potlucks where the entire neighborhood would gather with various dishes and recipes in tow, and somehow these magical bite-size treats were always there. Probably because they are so incredibly simple to make.

I don’t know if block parties exist anymore… and I’m not saying neighborly love is a thing of the past, but I don’t even know my neighbors names… and I’m fairly certain that if I took a new neighbor a plate of cookies they would look at me like I was a crazy person. I’m not sure if it’s just something that has changed over time or just a regional thing (maybe the heat makes Arizona people less friendly than their mid-western counterparts?).

However, if you want to be brave and bridge that gap between your home and your neighbor’s, these cookies should do the trick. There is no oven required, which makes this a relatively kid-friendly recipe. I don’t recommend leaving your children in the kitchen unattended, but I managed to make these a number of times in my youth without burning the house down. In fact, the hardest part about making these cookies is waiting for them to set before you try to eat them.

Note: If it’s too humid or too warm, these cookies won’t set properly, which means you might find yourself attempting to scoop spoonfulls of peanut buttery, chocolatey goop into your mouth (and probably making a mess in the process). You could just put them in the fridge to set… but who has time for that?

No-Bake Cookies

[ Printable Recipe ]

  • ½ cup (1 stick) butter
  • 2 cups sugar
  • ½ cup milk
  • 4 tablespoons cocoa powder
  • ½ cup peanut butter
  • 1 teaspoon vanilla extract
  • 3 cups quick-cooking oats* (see note for gluten-free option)

1. Melt butter in a large pan over medium heat. Whisk or stir in sugar, milk, and cocoa powder.

2. Increase heat and bring to a rolling boil, let boil for 1 minute 30 seconds.

3. Remove from heat and stir in the peanut butter, vanilla, and oats.

4. Drop by heaping tablespoons onto wax paper-lined baking sheets. (*see note)

5. Wait very patiently while they cool and harden. Store in an airtight container 3 days at room temperature or a week in the fridge. (They probably would keep for longer, but I’ve never had them last long enough to find out).

*These will set into whatever shape you drop them in. If you want them to be pretty, go ahead and make a perfect circle. Sometimes it’s fun to make little shapes out of them (heart-shaped cookies, anyone?), but they are equally delicious as an amorphous blob as they are in a perfect circle.

*If it’s too humid or too warm, these cookies won’t set properly, which means you might find yourself scooping spoonfulls of peanut buttery, chocolatey goop into your mouth (and running down your arms, probably a smear or two on your face). Or, if you can just put them in the fridge to set… but who has time for that?

*These can be made gluten-free by using gluten-free oats

oreo cheesecake cookies

oreo cheesecake cookie main

After I missed National Cheesecake Day, I vowed never to miss another food holiday again. Well, it turns out that I was a bit on the naive side. Did you know that there is a food holiday every day? Like, literally, EVERY DAY. I mean, I love food as much as the next girl… in fact, some may argue that I love food significantly more than the next girl, but every single day?? Isn’t that a bit overkill?

Monday was Root Beer Float Day, and today is Raspberries in Cream Day. August 5th was not only National Waffle Day, but National Oyster Day as well. We couldn’t even make them related? It had to be two of the most un-related foods celebrated on the same exact day? Granted, maybe Oyster Waffles are super delicious and I just have no idea. But seriously, calm down guys. We don’t need a food holiday every day... It will be OK.

I promise.

I’m on board for S’more Day on August 10th (THIS FRIDAY, GUYS!), maybe even Rum Day on the 16th, but  Soft Ice Cream Day and Julienne Fry Day are a bit much. What’s wrong with just “Fry-Day” (that could conveniently fall on a Friday every year), or just plain “Ice Cream Day”… why do we need to be so specific?

Anyway, I digress, moral of the story is that I missed Cheesecake Day and I’m sure that I missed Oreo Cookie Day (Which was apparently March 6th, for the record. Pretty sure I knew that thanks to the Birthday Cake Oreo, actually.)

So, In honor of belated Cheesecake Day & belated Oreo Day… in honor of all the other hundreds of food holidays I will miss (and have already missed)… and if you follow me on Pinterest, in honor of my apparent intense craving for Oreos…. I give to you:

Oreo     Cheesecake      Cookies.

Soft, chewy, cream cheese cookies rolled in Oreo cookie crumbs. So, essentially, a delicious cookie rolled in crushed delicious cookies, another cookie inception perhaps?

Oreo Cheesecake Cookies – Yields about 30 small cookies

[ Printable Recipe ]

  • 8 tablespoons (1 stick) unsalted butter, softened
  • 3 ounces cream cheese, softened
  • ½ teaspoon salt
  • 1 cup (7 ounces) sugar
  • 1 teaspoon vanilla extract
  • 1 cup (4.8 ounces) all-purpose flour
  • ½ cup mini chocolate chips
  • 1 cup oreo cookie sandwich crumbs (about 8 oreos)

1. Heat the oven to 375 degrees and line 2 baking sheets with parchment paper.

2. In a large bowl, beat the butter, cream cheese and salt on medium speed until smooth and creamy. Gradually add the sugar and continue beating until the mixture is light and fluffy, 1-2 minutes. Beat in the vanilla, and then add the flour and mix on low just until combined. Mix in the chocolate chips.

3. Roll or scoop the dough into 1-inch balls. Drop the dough balls into a bowl of oreo cookie crumbs and roll to coat. Arrange the dough balls 2 inches apart on the prepared baking sheets.

4. Bake the cookies for 8-10 minutes, until the edges just start to brown and the tops are set. Cool for a minute or two on the sheets, then transfer the cookies to wire racks and cool completely.

[ Adapted from crumblycookie.net ]

the infamous momofuku cornflake cookie

cornflake cookie main

After my trip to NYC with BFF a few years ago (HOW HAS IT BEEN THAT LONG?!) I’ve been dreaming of the day when I could once again enjoy the delicious treats from Momofuku Milk Bar. The only issue being that the recipes are unnecessarily complicated. They’re not THAT bad, but when I’m reading a recipe and its ingredients require recipes of their own, I get tired.

Shannon from A Periodic Table re-planted the Momfuku seed in my brain when she posted about them way back in December. Then just last week BFF made them and assured me they weren’t that hard to make. Finally, I couldn’t take it anymore. I had all of the ingredients in my pantry, and these cookies firmly planted in the front of my brain. With Shannon’s post and frantic texts to BFF to guide me, I set on my path to conquer the notoriously finicky Momofuku Milk Bar Cornflake Chocolate Chip Marshmallow Cookie. See, even the name is difficult.

I must admit, they weren’t that difficult to make. Not even that time-consuming (if you manage your time correctly). The cornflake crunch comes together quickly and requires a short cooling time, during which you can whip up your cookie batter. It’s even kinda relaxing since you can gather other things while you beat the butter and sugar for an eternity.

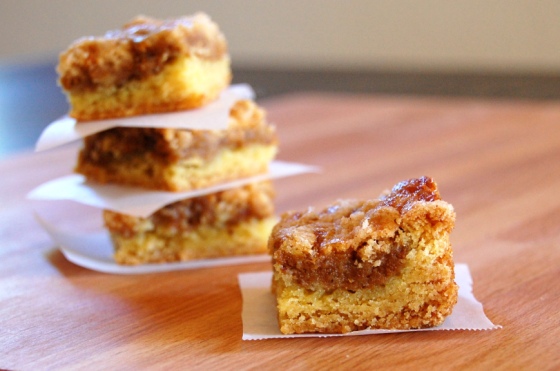
My only qualm was the size of the cookies. They were far too large. I followed the recipe’s  “1/3 cup” size ball of dough and ended up with what I decided was a “store-size cookie.” In fact, I’m pretty sure it’s about the exact size of what I received from the real Momfuku Milk Bar. A whopping 4-inch diameter, not that I couldn’t eat it, I just don’t appreciate the guilt that follows eating a giant cookie. And who is going to eat only half of a cookie? I know how that story ends, let me clue you in: there is no cookie at the end of that story.

In hopes of ending up with a more home-appropriate, single-serving cookie (therefore increasing the yield of said cookies, meaning you actually get more cookies to enjoy) I would probably scoop ¼ cup dough balls instead. That being said, I did not do that, so I can’t give you an accurate baking time, I’m going to guess it’ll shear two minutes off the baking time.

Speaking of the baking time, remember how these cookies are notoriously finicky cookies? The recipe as written calls for 18 minutes at 375, bestie (who did smaller cookies) baked hers for 8 minutes at 375…. That’s a bit of a difference, no? Shannon decided on 350 for 12 minutes. I actually baked mine per the original recipe directions with no problems. That being said, I distinctly remember the cookies I got from Momofuku being extra “rare”, where mine came out “medium”. Crisp, crunchy outside and chewy inside, filled with gooey marshmallow and flecks of chocolate….

Sorry I drifted off there for a moment. Back to the baking, let me share with you what my thoughts are on the wide variance in baking times (and temps).

Dough size (and shape)  – 1/3 cup is 1/3 cup is 1/3 cup. It is not ¼ cup or 5 tablespoons or just a “guesstimation” of what you think it should be. Reducing the cookie ball to ¼ cup size (per my recommendation) will affect the cookie’s cooking time. Smaller amounts will always need less time (obviously). As for the shape, mine looked like this:

If you bake ball-shaped dough (especially chilled), generally speaking the edges will melt down first, and leave a ball of chewiness in the center (again, depending on oven temperature and baking time).

If you use a ball that is slightly flattened, you are likely to end up with a more uniformly-shaped cookie. If your kitchen is very warm so you couldn’t make a dough ball to save your life, and your 1/3 cup measure is conveniently shaped like a dome with a flat top, voila. That is how I got this cookie shape. I don’t know if this is the shape you want, but it worked out OK for me.

Dough temperature – My kitchen is warm. Very warm. We live in the desert so our house generally hovers around the 76-78 degree mark, but once you turn the oven on for any length of time and the sun starts coming in those windows, the kitchen is definitely warmer. When I scooped my dough, it was way too warm to form them into actual balls, but I did my best (ended up with what you saw above) then chilled the shaped dough for 2 hours.

Oven temperature – Get a thermometer! Make sure your oven is the right temperature. And make sure you preheat it thoroughly – Don’t just throw the cookies in there because it beeped and said it’s ready. Give it some extra time. And don’t leave that oven door open for a thousand years, and FOR THE LOVE OF GOD DON’T OPEN THE OVEN DOOR A THOUSAND TIMES TO CHECK YOUR COOKIES. Unless you’re BFF and you don’t have an oven window.  Even then, try to reduce door-opening to a minimum. Start checking them when your house starts to smell like delicious cookies. As a rule, I know whatever I’m baking USUALLY isn’t done until the scent starts to make my tummy rumble.

Baking sheet temperature – I think this is one factor that is easy to overlook. If you put a cold baking sheet in a hot oven, it will take longer to heat up. I’m not a scientist, this is an assumption. The result? Cookie spread. Those thin, lacy edges. I transferred my dough (quickly) from the chilled cookie sheet in the oven to a room temperature sheet (with parchment) for baking.

Parchment paper – or lack thereof. Now, I know Silpats are widely popular and many people have great success with them, but I don’t use them. I find that more often than not, my cookies will spread too much if they are baked on a silicone baking mat. Plus, I’m way too lazy to try to clean that thing off. Some less finicky cookies are fine, I’m sure, but once I started baking regularly, that was one of the first things I noticed. My silicone-sheet cookies always spread too much. Just use parchment. No muss-no fuss easy clean up.

All that being said – these cookies that I was so terrified of making because they are known for being difficult came out just fine. So don’t let any of this scare you. If your first baking attempt doesn’t work, you’re likely to end up with a less pretty (but still delicious) cookie. One you can snack on as-is, or crumble and put in ice cream, or just cry into while you bake at the next temperature. Don’t worry, you’ll be fine. You can always use Shannon’s step-by-step resource to help, like I did… as you can see above. 🙂

Cornflake Crunch + Cornflake Chocolate Chip Marshmallow Cookie

[ Printable Recipe ]

cornflake crunch:

  • 5 cups of cornflakes
  • 1/2 cup of milk powder
  • 3 tablespoons of sugar
  • 1 teaspoon of kosher salt
  • 9 tablespoons of unsalted butter, melted

cookies:

  • 16 tablespoons (2 sticks) unsalted butter, at room temperature
  • 1 1/4 granulated sugar
  • 2/3 cup light brown sugar
  • 1 large egg
  • 1/2 teaspoon pure vanilla extract
  • 1 1/2 cups flour
  • 1/2 teaspoon baking powder
  • 1/4 teaspoon baking soda
  • 1 1/4 teaspoons kosher salt
  • 3 cups cornflake crunch
  • 2/3 cup mini chocolate chips
  • 1 1/4 cups mini marshmallows


Make the Crunch

Preheat oven to 275˚F.

Pour the cornflakes in a medium bowl and crush them with your hands to one-quarter of their original size. Add the milk powder, sugar and salt and toss to mix. Add the butter and toss well to coat. The mixture should form small clusters.

Spread the clusters onto a parchment-lined sheet pan and bake for 20 minutes, until toasted.

Cool the crunch mixture completely before adding to your cookie mixture. It cools pretty fast, so while you’re waiting on this to finish cooling, begin assembling your cookies.

Make the dough

Line a sheet pan which will fit in your refrigerator with parchment paper.(these cookies have to chill!)

Combine butter and sugars in the bowl of a stand mixer fitted with the paddle attachment and cream together on medium-high for 3 minutes. Scrape down the sides of the bowl, add the egg and vanilla, and beat on high for 7-8 minutes. (I know it seems weird, almost wrong even… just do it. Don’t think about it. Just do it….) Have you ever seen anything so fluffy in all your life?

Reduce mixer speed to low and add flour, baking powder, baking soda, and salt. Mix just until the dough comes together, no longer than one minute. Do not overmix.

Still on low speed, mix in the cornflake crunch and chocolate chips just until incorporated, no more than 30 seconds or so. Add the marshmallows and mix again on low just until incorporated, about 30 seconds. If you feel like it’s uneven, use a spatula or large spoon and sort of fold them in the rest of the way.

Portion out the dough in ⅓-cup size scoops onto your prepared sheet pan.**(NOTE: I suggest ¼ cup size, but it means you will have to reduce the baking time).

Gently flatten the very top of the cookie – we just don’t want it to be a ball. Remember my picture?

Wrap entire sheet in plastic wrap and refrigerate for at least one hour (I did 2 hours – per Shannon’s directions) or up to one week.

Bake the cookies

When you’re ready, preheat oven to 375˚F (or 350 if you want to follow Shannon: if you’re unsure, here’s her chart for the bajillionth time)

Arrange the chilled dough a minimum of 4 inches apart on a parchment-lined sheet pan. They are big, and they’re only getting bigger in the oven. I baked mine 4 at a time, and got tired after 2 batches so I froze the rest of the dough until my next cornflake cookie craving.

Bake cookies for 10 – 18 minutes (sorry on the time variance, guys, if you read the story, you know why). Start checking around 10 minutes. When the cookies are done they should be nice and golden.

Remove the cookies from the oven and cool cookies completely on the pan, since we are cooling them on the pan, you can pull them out a little shy of done (I prefer my cookies on the medium-rare side, these I consider “medium”)

[ Adapted from the Momofuku Milk Bar Cookbook & A Periodic Table ]