no-bake s’more bars

smore bar no bake 1

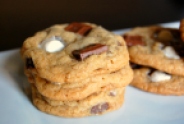
Today is the last day to celebrate National S’more Month!!! So hurry up and make these quick and easy S’more Bars!!

You can make these babies in the microwave, which means you don’t have to endure any extra heat – no stove, no oven, no fire, no outside. Just sweet, delicious s’more goodness in the comfort of your air-conditioned home.

For these bars I used a recipe that melted the chocolate with the marshmallow, but I think my usual recipe of s’more bars that mixes chocolate chips in at the end is actually better.

Also, these are SUPER STICKY!!! REALLY, REALLY STICKY. I suspect the corn syrup is to blame… the recipe I usually make is just the good ol’ Rice Krispy Treat recipe with Golden Grahams in place of Rice Krispies and add the extra mini mallows and chocolate chips at the end…

Luckily, these are so easy to make that you can make them both ways and judge for yourself.

No-Bake S’more Bars

[ Printable Recipe ]

  • 8 cups (1 box) Golden Grahams cereal
  • 6 cups (1 bag)  miniature marshmallows, reserve 1 cup
  • 1½ cups chocolate chips*
  • ¼ cup light corn syrup
  • 5 tablespoons butter
  • 1 teaspoon vanilla (optional)
  1. Butter a 9×13-inch baking dish and line with parchment paper or plastic wrap; set aside.
  2. Place the cereal in a large mixing bowl; set aside.
  3. In a large bowl, combine 5 cups of marshmallows, chocolate*, light corn syrup and butter. Microwave in 30-second increments, stirring after each, until the mixture is completely melted and smooth. Stir in the vanilla.
  4. Pour the melted mixture over the cereal and, using a buttered spatula or wooden spoon, gently stir until all of the cereal is coated. Stir in the additional cup of marshmallows (and chocolate, if you didn’t melt it with the marshmallows)
  5. Turn the mixture out into the prepared baking pan. Butter your hands and press the mixture evenly into the pan, pushing it down into a flat, even layer. Cool for at least 1 hour at room temperature (refrigerate to speed up this process).

**READ THE TIPS BELOW**

*You can either melt the chocolate with the 5 cups of marshmallows, or stir it in with the last 1 cup. Make sure you use a REALLY BIG BOWL and REALLY STRONG ARMS for stirring. It’s REALLY HARD!!!

*Cover with parchment paper and smoosh down to help you spread them more easily.

*These can also be made on the stovetop, just like you would make regular rice krispy treats, melt it all over low heat, and then stir in cereal and mix-ins, and pour into pan and spread. 

*These can be stored in an airtight container at room temperature for up to 2 days, but good luck with that.

[ Adapted from Brown Eyed Baker ]

OG No Bake S’more Bars

  • 3 Tbsp butter
  • 10 oz large marshmallows
  • 4 1/2 C Golden Grahams
  • 1 – 2 C mini mallows
  • 1 C mini chocolate chips

1. Melt butter & marshmallows together. Once melted, add cereal. Once the cereal is mostly coated, add the mini mallows and chocolate chips.

2. Spread into greased pan. Sprinkle with additional mallows/chips, if desired. I think it’s fun to drizzle a little criss-cross of melted chocolate over the top, too. If I’m feeling motivated.

3. Once cooled, cut into squares and store in an air-tight container.

*Tip: Cover with parchment paper and smoosh down to help you spread them more easily.

[ Adapted from the Rice Krispies box ]

You may also like:


kettle corn ( and easy super bowl treats )

kettle corn main

Kettle corn is the perfect snack for any time of day, for kids and grown-ups alike. Plus, I hear the Super Bowl is coming up, and this would be a great make-ahead snack for your upcoming Super Bowl party – a perfect combination of salty, sweet, and crunchy all in one bite!

I compiled a short list of other great super bowl menu items with only two criteria:

   1. You must be able to make it ahead of time

   2. It must be easy to make

That sounds like two pretty good qualifications, right?

So, feast your eyes on these:

Soft pretzel bites – great served with honey mustard or a store-bought queso
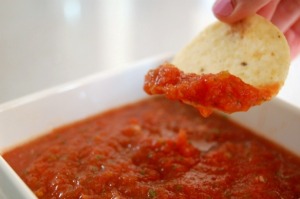
Home-made Cheez ItsRestaurant style salsa– serve with store-bought chips
Beef dip sandwiches – make up to 2 days ahead in your slow cooker and serve slider rolls for bite-size treats
This Caprese Salad is a great alternative to a pasta salad, and a more healthful option (but you don’t have to tell anyone else that)
You’ve still got a few days, go ahead and infuse some vodka with berries while you’re at it Don’t forget dessert! How bout some rice krispy treats or blondies (using m&ms with your favorite team’s colors

Oh yeah, let’s not forget the kettle corn recipe! It’s more or less like this – equal parts oil and sugar, pop your corn in it, sprinkle with salt. Done!

I did 3 Tbsp oil + 1/3 cup kernels just because that’s what was on the back of my popcorn container. You can adjust for more or less, just make sure the oil coats the bottom of your pan and that you have equal parts (or close to) sugar and oil.

Kettle Corn – makes about 4 cups popped popcorn

[ Printable Recipe ]

  • 3 Tbsp oil
  • 3 Tbsp sugar
  • 1/3 c popcorn kernels
  • salt, to taste

1. Heat oil in a heavy-bottomed pan over medium heat. Add a few kernels to the pan and cover.

2. Once those kernels pop, add the rest of the popcorn kernels along with the sugar. Replace lid and shake like crazy while they continue to pop. Be careful not to let the sugar burn (I usually swirl mine so that only part of the pan is over the burner at any given point in time). If you’re lucky, you might have one of these guys to stir for you.

3. When popping slows to a few seconds between kernels, you’re done! Go ahead and dump into a large bowl, sprinkle with desired amount of salt and toss. I usually pour half in, salt and toss that half, then pour the rest in and salt and toss again (for better coverage).

*If at any point you think your sugar is starting to burn, just go ahead and pour your popcorn into the bowl. No point in sacrificing all that popcorn just waiting for those last few kernels to pop!

*You can also add the salt at the same time as the sugar – but I like being able to taste and adjust

red velvet rice krispy treats

red velvet krispy

I hope everyone had a wonderful Christmas, I know I did! BF and I opened our gifts first thing in the morning, then his family came over for Christmas brunch so we could exchange our gifts and spend time together.

The one benefit to opening gifts at our house – a ton of gifts under the tree!

The downfall? Most of them aren’t for us…

They came, they ate, they conquered… their presents at least. ^_^

BF got me some really great cookbooks and a light box, which will (hopefully) improve the quality of my photos. (Remember my last post where I was complaining about trying to photograph in poor light??) Isn’t he just the greatest?

( Yes, these rice krispy treats were photographed in that very box ) Don’t they look gorgeous?! I think the light box will improve the pictures a bit, until I save up enough for a better lens, at least. 🙂

Oh, yes, the recipe. That’s what you’re here for right? Delicious red velvet rice krispy treats?? Well, I made these for Christmas and then realized they would be even better for Halloween. These blood-red treats are a twist on the “birthday cake” rice krispy treats, just replacing the cake mix in those with red velvet cake mix, and the standard rice krispies with chocolate (since cocoa cake is the base of red velvet cake).

Just like the birthday cake rice krispies, you can use however much cake mix you like depending on how strong you want the cake flavor to be.

I finished mine with a drizzle of vanilla candy coating, but I’m sure white chocolate or even icing would do in a pinch.

Red Velvet Rice Krispy Treats

[ Printable Recipe ]

  • 3 tablespoons butter
  • 1 (10.5 ounce) bag mini marshmallows
  • 1 teaspoon vanilla extract
  • 1/2 cup red velvet cake mix (you can decrease to 1/4 for milder flavor, or increase to 3/4 for more cake flavor)
  • 6 cups Cocoa Rice Krispies cereal
  • Vanilla candy coating or white chocolate chips

1. Line a 9×13-inch pan with parchment paper and coat well with cooking spray. Set aside.

2. In a large saucepan, melt the butter over low heat. Add marshmallows, cake mix, and vanilla, stirring until smooth. Fold in the cereal until well coated.

3. Transfer sticky cereal mixture to the prepared pan, pressing down until the top is level.

4. Once cooled, drizzle with melted candy coating or chocolate top. Once set, cut into bars and serve.

Pumpkin Spice Rice Krispy Treats

dsc_4532-2

So I’m on a little bit of a pumpkin kick, so sue me. Get off my back, it’s fall and, honestly, this isn’t the last pumpkin recipe you’re going to see up here…

I was having a really off day in the kitchen this Sunday, so I decided it was probably in my best interest to stick to “simple” recipes. Isn’t it weird how that happens? Some days it’s just like no matter what you make, even if it’s a recipe you’ve made 100 times before, something is just… off. Like I had kitchen amnesia or something… it was really annoying. Eventually I just gave up and sat on the couch for the rest of the day. Upsetting.

Once I saw this autumn twist on a classic treat I just had to try it. It looks easy enough, relatively difficult to mess up, I mean… it is a rice krispy treat, after all. Given my list of other krispy treat creations, how could I pass it up? Plus, um hello – PUMPKIN!

If you want an easy treat to take to a work potluck or just want a creative way to use up the rest of your crisp rice cereal (or leftover pumpkin puree), go ahead and give these bars a whirl.

Pumpkin Spice Rice Krispies

[ Printable Recipe ]

  • 3 tablespoons unsalted butter
  • 1/4 cup canned pumpkin puree
  • 1 (10 ounce) bag mini marshmallows plus one cup
  • 1/4 teaspoon pure vanilla extract
  • 1/4 teaspoon ground cinnamon
  • Pinch of allspice
  • Pinch of freshly grated nutmeg
  • Pinch of kosher salt
  • 6 cups puffed rice cereal

Butter a 9×13-inch baking dish (I like to line mine in plastic wrap – no mess to clean up!)

Melt butter over medium-low heat. Add the pumpkin puree and continue to cook until it is warmed through. Fold in 10 ounces of the marshmallows, stirring frequently until almost completely melted. Stir in vanilla, cinnamon, allspice, nutmeg, and salt, and remove from heat.

THIS NEXT PART IS IMPORTANT…

Allow the marshmallow mixture to cool 10 minutes; fold in the remaining cup of marshmallows. Continue to cool the mixture for another 20 to 25 minutes until it is room temperature (failure to cool the mixture will result in soggy rice crispy treats.)

Add the puffed rice cereal and stir, using a silicone spatula, until combined.

Press the mixture into the greased rectangular baking dish. Let set for 30 minutes before cutting and serving.

* I suspect the world will not come to a screeching halt if you use pumpkin pie filling, just reduce or omit the other spices (except vanilla)

oreo dirt

dirt main

Dirt is the quintessential Halloween treat. I remember I first enjoyed it at my grandma’s Halloween party. I don’t know how old I was, but I was young enough to be at my grandma’s… for a Halloween party. So, I was pretty young, I guess. I don’t remember the specifics of grandma’s dirt recipe, but I know that every recipe I saw after that had cream cheese. Since I spent the majority of my life (up until the last few months, actually) hating cream cheese, I had to create my own equally (or more-so) delicious version.

So, I don’t know if this is officially “dirt”, but it’s a creamy chocolate dessert, covered with oreos, that you can stick worms and other fun stuff in to make it look like a graveyard (if you’re going Halloween-y). Otherwise, you can opt out of the extra decoration and just enjoy yourself some creamy, chocolatey, oreo goodness.

Oh, and you don’t have to do individual servings. If you’re going “halloweeny” sometimes it’s better to do one big cake pan and turn it into a graveyard (I’ll post a picture of that version later). 🙂

Dirt

[ Printable Recipe ]

  • 1 large package instant chocolate pudding
  • 1 container whipped topping
  • 1/2 package (or more…) Oreos, crushed
  • gummi worms, or other decorations (if desired)

1. Make pudding according to package directions.

2. Spread pudding on bottom layer of dish, reserving about 1/4 – 1/3 of the mixture in a separate bowl.

3. Mix half of the whipped topping and half of the crushed oreos with the reserved chocolate pudding. Spread on top of pudding layer.

4. Cover with remaining whipped topping and a generous sprinkling of Oreos. Go on, dump ’em on there…

5. Decorate with gummi worms, gummi bears, “grave stones” (aka cookies); if desired. Chill a couple hours in the fridge before serving.

* To make “grave stones”, dip elf cookie, graham cracker, anything that general shape, into melted white chocolate or white candy couveture ( if you have some black food coloring, you can turn it gray ). let dry, and using a food-safe marker or icing write “RIP”

* To make “ghosts” dip nutter butter (or anything that shape) into white candy couveture, draw or pipe on the little black eyes and mouth.

* You could also use rolled fondant instead of couveture if desired. It all depends on how fancy you want to get. If you’re not that into it, just do gummi worms, or even just cute halloween-y cupcake toppers – it’s the easy way out 🙂